Red Tip Photinia
typical season: plant Sep – Apr · set your climate
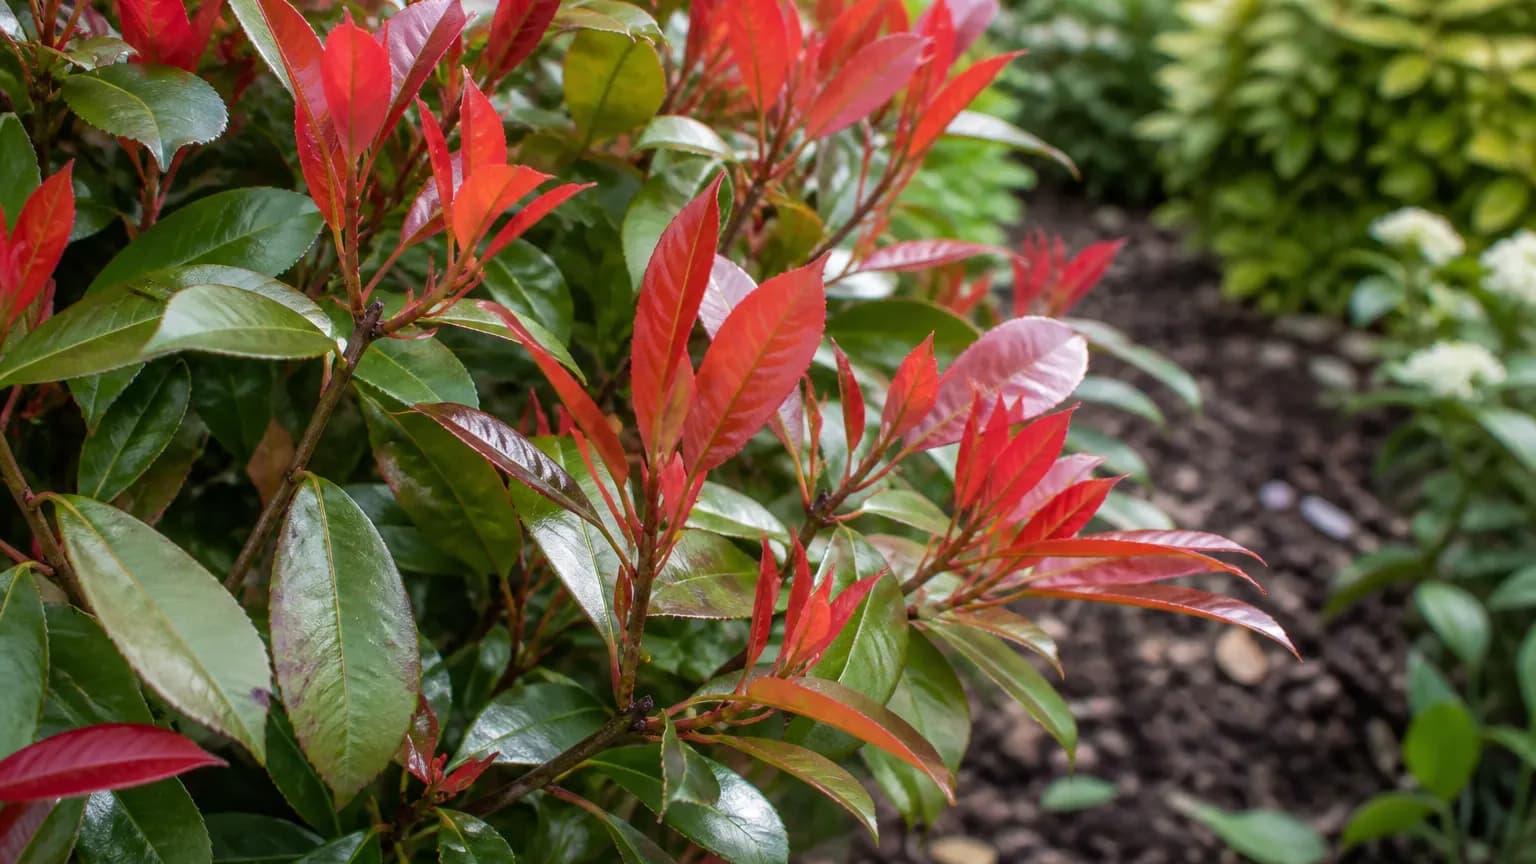
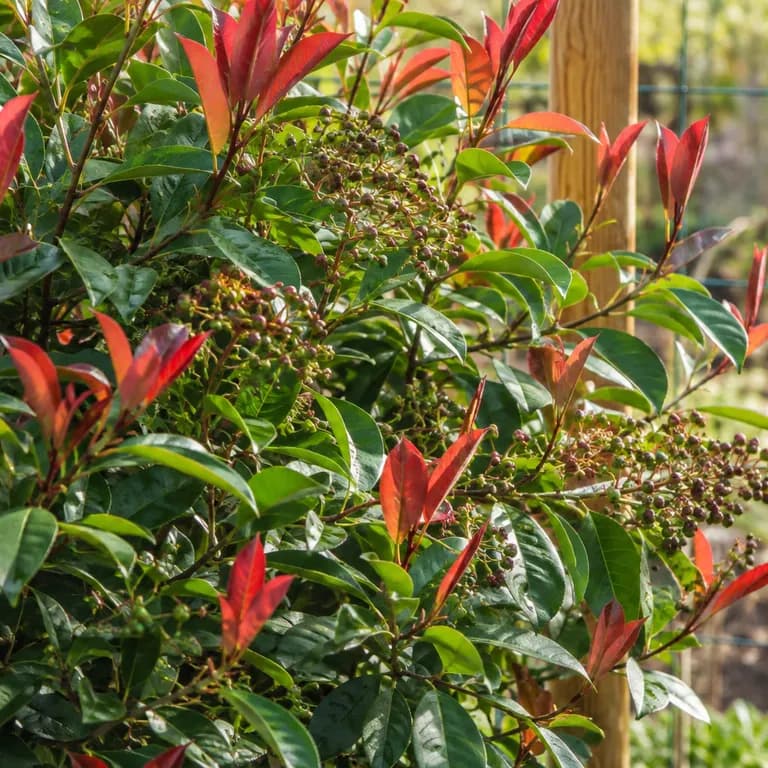
The classic fast privacy hedge with a trick no other evergreen matches: every pruning triggers a fresh flush of brilliant scarlet-red young leaves that slowly mature to deep glossy green.
On this pageOverview
Meet Red Tip Photinia
The classic fast privacy hedge with a trick no other evergreen matches: every pruning triggers a fresh flush of brilliant scarlet-red young leaves that slowly mature to deep glossy green. Red tip photinia grows 30 to 60 cm per year, fills gaps quickly, and tolerates repeated shearing, which is exactly what keeps the color coming. The cultivar Red Robin is the benchmark selection found in nurseries worldwide. Its one honest weakness is Entomosporium leaf spot in humid climates, so give it full sun, good air circulation, and well-drained soil. Best suited to zones 7 to 9, where it forms a dense, colorful screen within two to three seasons.
When to plant Red Tip Photinia
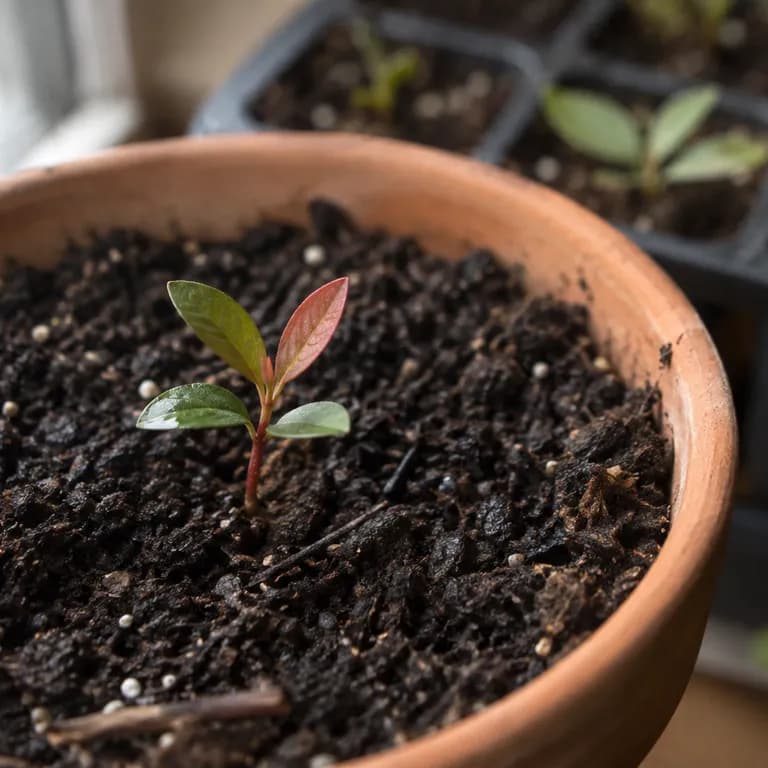
Photinia is almost never grown from seed by gardeners: the hybrid does not come true from seed, germination is slow and erratic, and seedlings take years to reach hedge size. Nurseries propagate by semi-hardwood cuttings taken in late summer, and home gardeners can do the same. Take 10 to 15 cm cuttings from firm, current-season growth in August or September, strip the lower leaves, dip the base in rooting hormone, and insert into a moist mix of perlite and peat or coarse sand. Keep humid and shaded at 18 to 22 degrees Celsius; rooting takes six to ten weeks. Pot up rooted cuttings in spring and grow on for a full season before planting out.
Your Red Tip Photinia Year
Composed for Zone 7 · typical seasons · frost passes Apr 2, returns Nov 1
Plant Red Tip Photinia Mar – Apr, Sep – Oct, in bloom Mar – Apr, Oct – Nov. Check the planting methods below and set your climate to personalize these windows.
Remind me when it's time to sow Red Tip Photinia
The window opens Sep 1 where you garden. One email a few days before and one two weeks before it closes.
One email per milestone, never more than one a week. Unsubscribe with one tap. No account needed.
How to grow Red Tip Photinia
Red tip photinia is one of the fastest ways to build an evergreen privacy screen, and it rewards a little planning at planting time. Choose a position in full sun with well-drained soil and a pH of 5.5 to 7.0; full sun produces the most intense red flush, while shade yields greener, softer, more disease-prone growth. For a dense hedge, space plants 60 to 90 cm apart (about 2 to 3 plants per meter); for a looser screen or specimen planting, allow 1.5 to 2 meters. Plant container-grown stock in early to mid-spring or early to mid-autumn, setting the root ball at the same depth it grew in the pot, watering deeply, and mulching with 5 to 8 cm of organic matter kept clear of the stems.
The pruning rhythm is the whole secret of this shrub. Each cut stimulates a flush of vivid red new growth, so instead of pruning less, you prune on a schedule: a first trim in late spring once the initial flush begins to bronze, a second in midsummer, and an optional light tidy in early autumn. In return you get fresh color three times a year. Always finish the last cut at least six weeks before the first expected frost so new shoots can harden. Young hedges benefit from tip-pinching in their first two seasons to build density from the base up rather than letting a few leggy shoots run ahead.
Water deeply once or twice a week during the first two summers, then only during prolonged drought once established. Feed with a balanced slow-release fertilizer in early spring and avoid heavy nitrogen after midsummer, as soft late growth is both frost-tender and highly susceptible to leaf spot. In humid regions, water only at the base, never overhead, and thin the hedge lightly each year so air moves through the canopy; these two habits matter more than any spray for keeping Entomosporium leaf spot at bay.
Red Tip Photinia's best neighbours
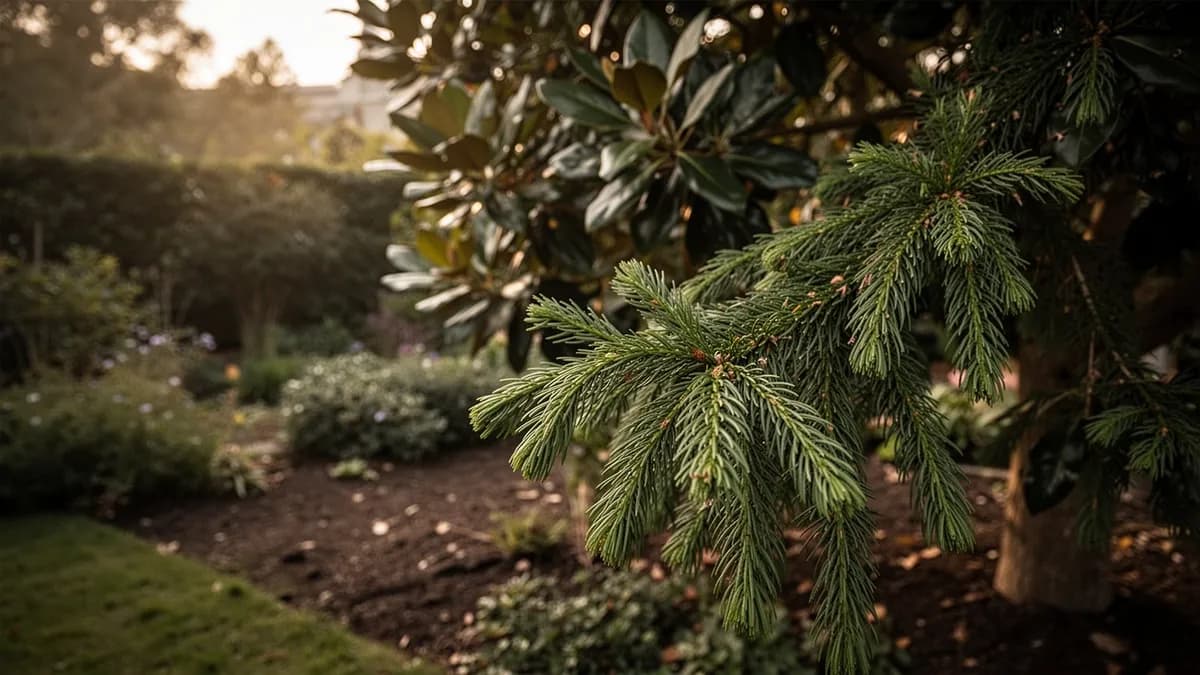
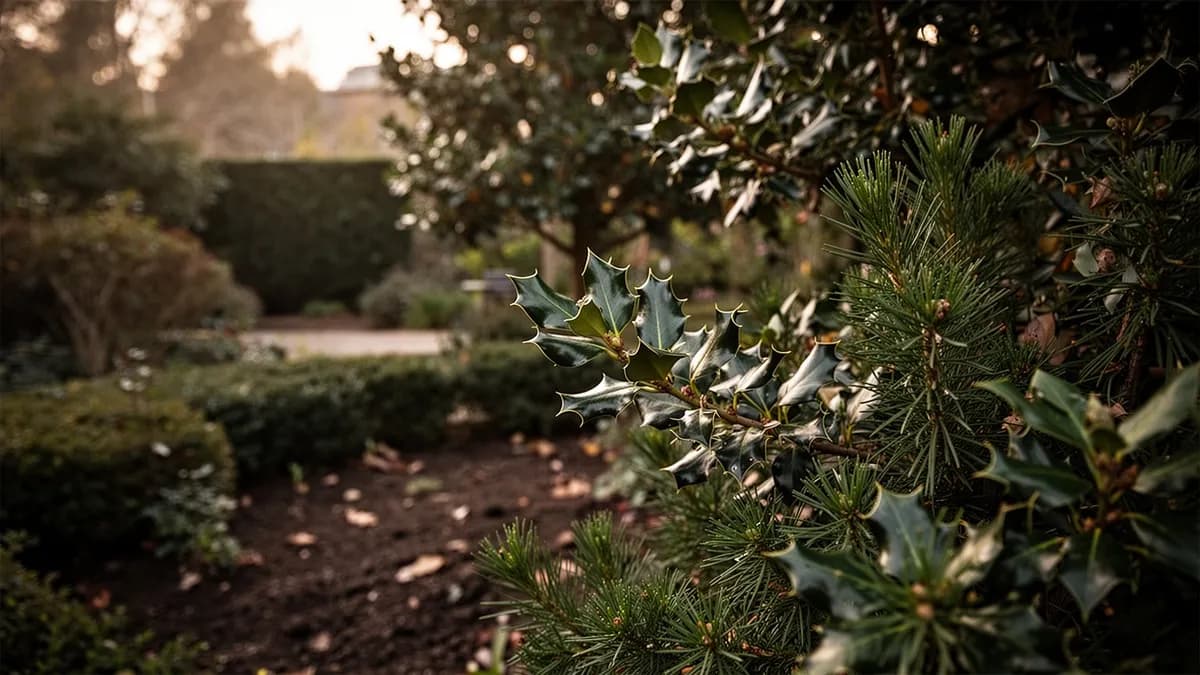
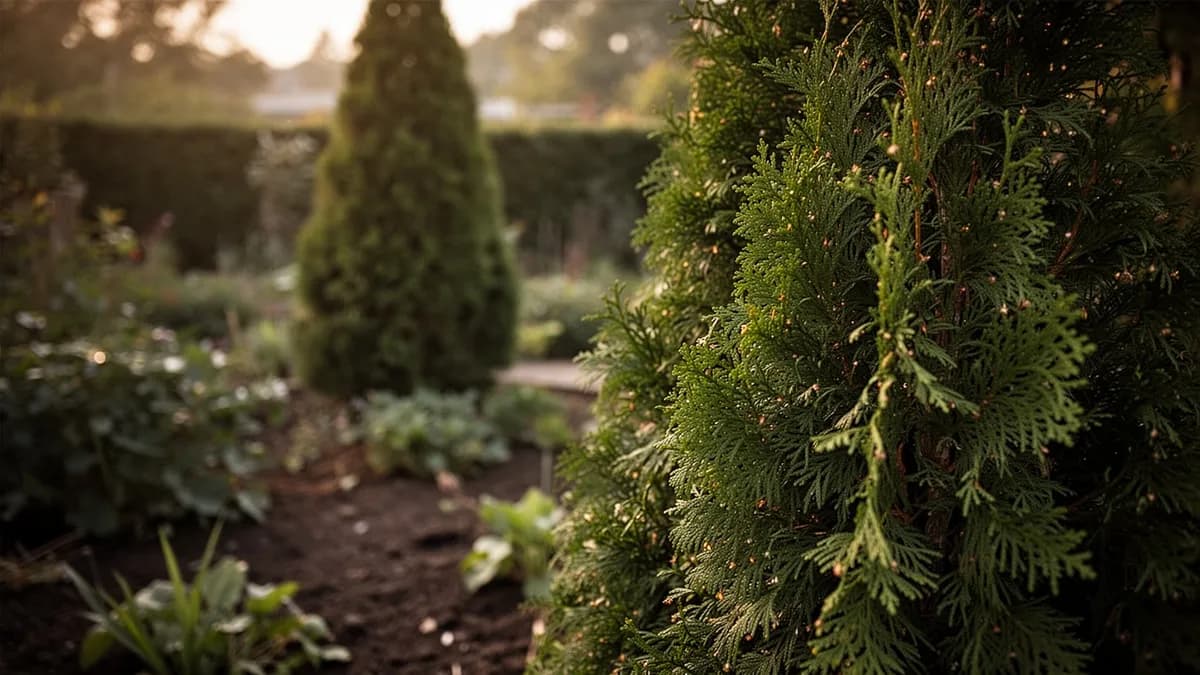
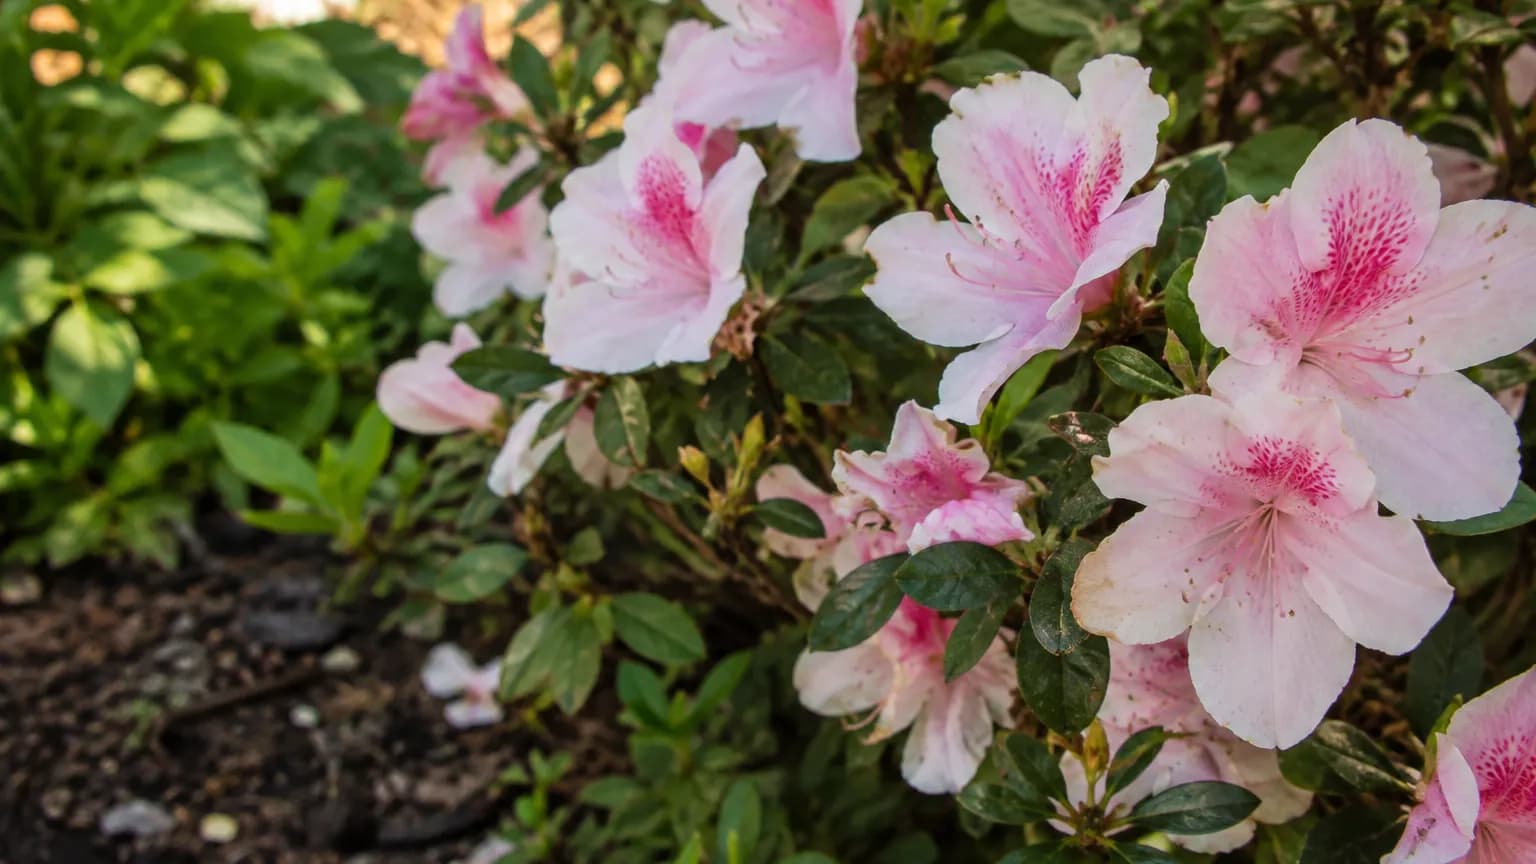
As a dense evergreen screen, red tip photinia pairs best with other structural shrubs that share its love of sun and well-drained soil. Bay laurel (laurel-tree) makes a classic companion in mixed evergreen screens, adding aromatic foliage and culinary value. Holly (holly-tree) contributes contrasting spiny texture and winter berries beneath or alongside a photinia hedge. Arborvitae interplants well in larger boundary plantings, its conical form breaking up the broadleaf mass. Underplant the base with spring bulbs such as daffodils that finish before the hedge's main flush, and keep the root zone clear of thirsty ground covers while the hedge establishes.
Laurel Tree belongs beside it.
Old growers' knowledge, checked against Red Tip Photinia's real companion table below — test any plant you're growing.
Related growing guides
Feed it well
Red tip photinia is unfussy about soil as long as it drains well, thriving in sandy loam to clay loam with a pH of 5.5 to 7.0. Heavy, waterlogged clay is the one real killer, as it invites Phytophthora root rot; amend compacted ground with compost and grit or plant on a low mound. Feed once in early spring with a balanced slow-release fertilizer formulated for shrubs, and no more: excess nitrogen pushes soft, sappy growth that aphids and Entomosporium leaf spot exploit. Maintain a 5 to 8 cm mulch layer of composted bark or leaves over the root zone to hold moisture and buffer soil temperature, keeping it clear of the stems.
Ideal Temperature
Hardiness Zone Compatibility
From seed to harvest, stage by stage
Cutting Propagation
Red tip photinia is propagated from semi-hardwood cuttings taken in late summer, when current-season growth has firmed but not yet turned woody. Cuttings of 10 to 15 cm are stripped of their lower leaves, dipped in rooting hormone, and inserted into a moist, free-draining medium such as perlite mixed with peat or coarse sand. Kept humid, shaded, and warm, they form roots in six to ten weeks.
Establishment Phase
Rooted cuttings are potted up and grown on through their first full season, or container-grown nursery stock is planted out in spring or autumn. During this year the shrub puts most of its energy into building a root system, adding modest top growth of 20 to 40 cm. The first flushes of red new leaves appear, though plants still look sparse.
Framework Building
In the second season growth accelerates sharply to 30 to 60 cm per year and the hedge begins to knit together. Red flushes follow every light trim, and the woody framework thickens. Plants spaced 60 to 90 cm apart typically close their gaps by the end of this stage, reaching functional hedge density and a height of 1 to 1.5 meters.
Functional Screen
The hedge reaches maturity and now performs its full screening role, typically 1.5 to 2.5 meters tall and dense from top to bottom when well maintained. The red flush after each trim is strongest in these vigorous years. Unpruned sections may flower in late spring and set clusters of small red berries that ripen to black and feed birds through winter.
Mature Hedge
A well-kept red tip photinia hedge remains attractive and effective for fifteen to twenty years or more. Growth continues at a steady pace and must be managed with regular trimming to hold the desired size. Left entirely unpruned, individual shrubs mature into large, multi-stemmed specimens of 3 to 5 meters with grey-barked trunks, spring flower clusters, and autumn berries.
Cover cuttings with a clear dome or plastic tent to hold humidity, keep them out of direct sun, and never let the medium dry out or turn soggy. Bottom heat around 20 degrees Celsius noticeably speeds rooting. Pot on as soon as roots fill the module.
Caring for Red Tip Photinia month by month
What to do each month for your Red Tip Photinia
November
You are hereRake and destroy fallen leaves beneath the hedge to remove overwintering leaf-spot spores. Add a fresh mulch layer for root insulation in colder parts of its range, and protect young, newly planted shrubs from harsh wind with temporary screening.
Harvesting Red Tip Photinia
Red tip photinia is an ornamental shrub, not an edible crop, so the harvest is decorative rather than culinary. The valuable cut material is the brilliant red new growth, which peaks in early to mid-spring and again in mid- to late autumn after trimming. Cut red-flushed stems in the cool of early morning with clean shears and condition them in water for several hours; they hold well in arrangements for a week or more and add striking color to seasonal wreaths and bouquets. Routine hedge trimming provides a steady supply. Never consume the foliage or berries.
What goes wrong — and the fix
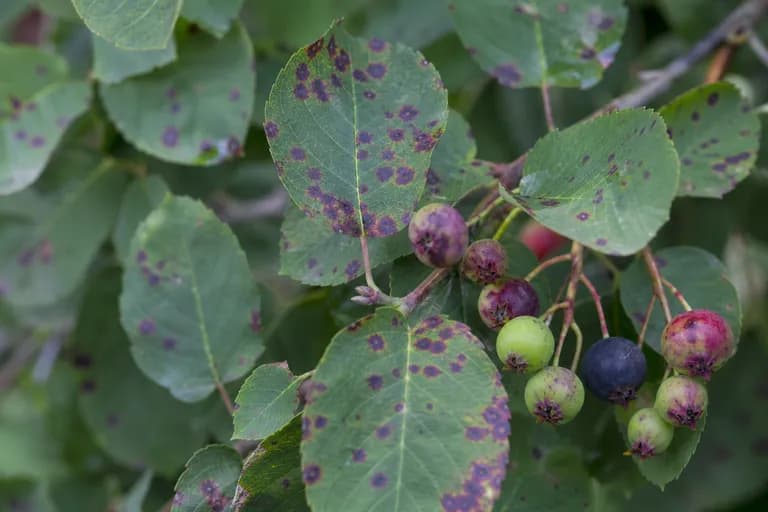
Entomosporium Leaf Spot
DiseaseSmall, circular, bright red spots on young leaves in spring that enlarge into dark maroon blotches with gray centers, often surrounded by yellow halos. Heavy infections cause premature leaf drop that starts low in the hedge and moves upward, leaving thin, bare interiors.
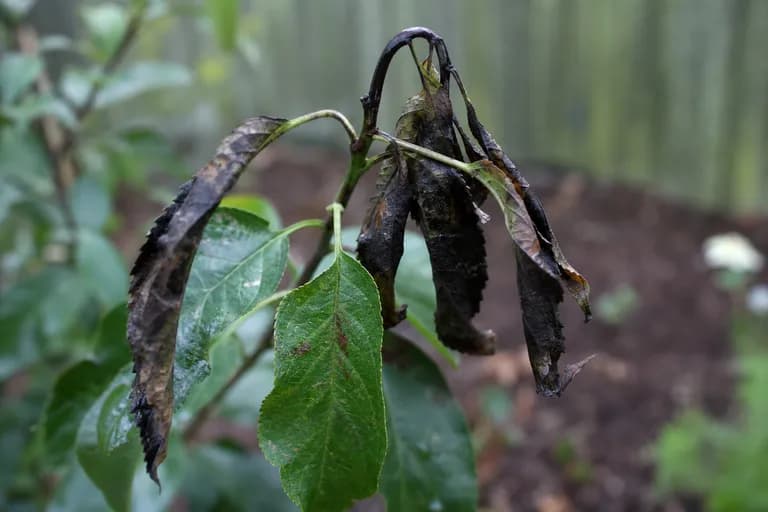
Fire Blight
DiseaseShoot tips suddenly wilt, blacken, and curl into a shepherd's crook shape, looking as though scorched by fire. Blossoms and young shoots collapse, and sunken cankers may appear on larger stems, sometimes oozing amber bacterial slime in wet weather.
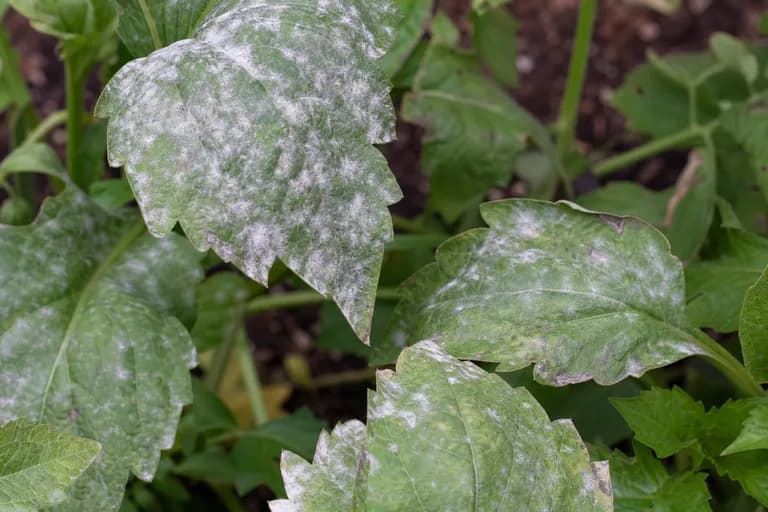
Powdery Mildew
DiseaseWhite to grayish powdery coating on young leaves, shoots, and flower clusters, often causing curled or distorted new growth. Most common on crowded hedges in shaded, still air during warm days and cool, humid nights.
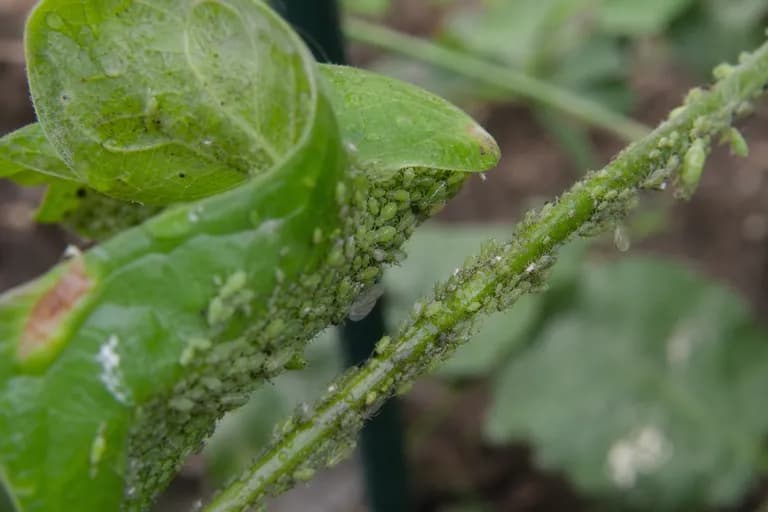
Aphids
PestColonies of small green or black insects clustered on tender red shoot tips, causing curled, sticky leaves coated with honeydew. Sooty mold often develops on the honeydew, dulling the glossy foliage.
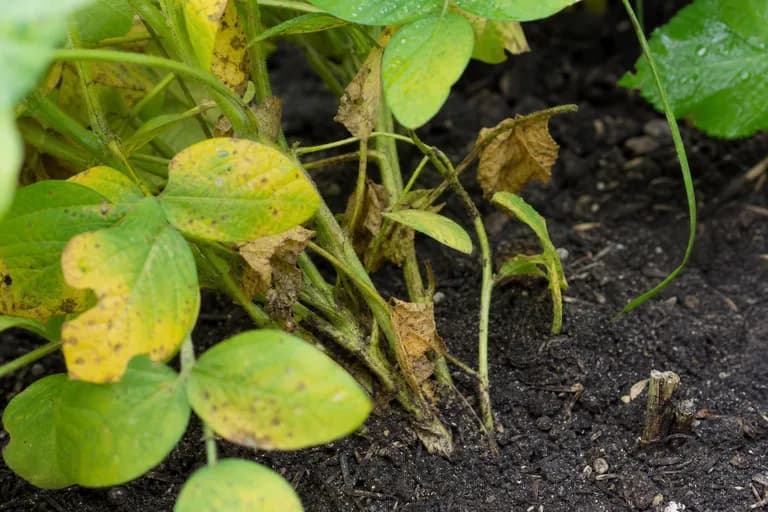
Phytophthora Root Rot
DiseaseGradual yellowing and thinning of the canopy, wilting despite adequate water, dark and brittle roots, and dieback that often starts on one side of the plant. Worst in heavy, waterlogged clay soils and poorly drained low spots.
Troubleshooting Common Problems
Entomosporium leaf spot is by far the most frequent complaint, showing as red-to-maroon leaf spots and premature defoliation in humid springs; it is managed with sun, airflow, base watering, and autumn clean-up rather than spraying. A green, colorless hedge almost always means too little pruning or too much shade, since the red flush only follows fresh growth. Late frosts can blacken the tender red tips in spring, but plants quickly re-shoot after a light trim. Yellowing leaves with stunted growth point to waterlogged roots or lime-induced chlorosis on very alkaline soils. In cold pockets, young plants suffer wind scorch and winter burn until established.
Growing Tips
- For a dense privacy hedge, space plants 60 to 90 cm apart in a single row; for a quicker, thicker screen, stagger two rows 45 cm apart. Resist tighter spacing, since crowded plants trap humidity and invite leaf spot.
- Prune on a rhythm rather than waiting for the hedge to look shaggy: trim after the spring flush bronzes, again in midsummer, and lightly in early autumn. Each cut triggers the next flush of red growth, so regular light trims beat one annual hard cut.
- Plant in the sunniest spot available. Full sun produces the deepest red color and the driest, healthiest foliage; shaded photinia turns green, grows leggy, and suffers far more from fungal disease.
- Get the drainage right before planting. In heavy clay, build a low mound or raised bed and work in compost and coarse grit, because Phytophthora root rot in wet soil kills more photinias than any pest.
- Always water at the base, early in the morning, and never with overhead sprinklers. Wet foliage, especially overnight, is the main driver of Entomosporium leaf spot in humid climates.
- Disinfect hedge trimmers and shears with alcohol or a bleach solution between plants when cutting out diseased wood, and dispose of infected clippings in the trash rather than the compost heap.
- Feed sparingly: one application of balanced slow-release fertilizer in early spring is enough. Heavy nitrogen pushes soft, sappy growth that aphids and leaf spot both prefer.
- For containers and small gardens, choose the dwarf Little Red Robin in a pot at least 45 cm wide with sharp drainage, and trim lightly two or three times a season to hold its natural ball shape.
- Shape hedges with a slight taper, wider at the base than the top, so sunlight reaches the lower foliage and the hedge stays dense all the way to the ground instead of thinning out at ankle level.
Pick your Red Tip Photinia
Red Robin
The benchmark cultivar and the most widely planted photinia in the world, selected in New Zealand for its exceptionally bright scarlet new growth. Fast-growing to 3 to 5 meters if unpruned, it forms a dense hedge that colors up reliably after every trim.
Little Red Robin
A true dwarf form that naturally holds a compact ball shape around 1 meter tall, with smaller, rounder leaves that flush an even brighter red. Ideal for low borders, containers, and small gardens where full-size Red Robin would overwhelm.
Pink Marble
Also sold under its cultivar name Cassini, this variegated selection carries new leaves marbled in pink, cream, and green, maturing to dark green edged in white. Slower-growing than Red Robin and superb as a single specimen or informal hedge.
Palette
A compact variegated cultivar with cream-edged leaves that flush soft pink before maturing. Reaches roughly 1.5 to 2 meters, tolerates partial shade better than most selections, and suits smaller hedges and mixed shrub borders.
Carre Rouge
A compact Red Robin selection with smaller, darker red leaves and a denser, slower habit reaching about 2 to 2.5 meters. Requires less frequent trimming to stay tidy, making it a lower-maintenance choice for formal hedging.
Where Red Tip Photinia comes from
Red tip photinia is an accidental hybrid between two East Asian species, Photinia glabra of Japan and China and Photinia serratifolia of China and Taiwan, both long cultivated for their glossy evergreen foliage and colorful young growth. The cross occurred by chance at Fraser Nursery in Birmingham, Alabama, in the 1940s, and the seedling's exceptional vigor and brilliant red flush earned it a formal introduction in the 1950s under the name Photinia × fraseri, honoring the nursery. It spread rapidly through American landscaping as the default fast privacy hedge of the mild-climate suburbs.
The cultivar Red Robin, selected in New Zealand for its especially bright and reliable red growth, became the global standard and remains the form most gardeners know. Through the late twentieth century photinia hedges defined suburban boundaries from California to the Carolinas and across Europe, Australia, and New Zealand. When Entomosporium leaf spot devastated mass plantings in humid regions, growers adapted rather than abandoning the shrub: wider spacing, full-sun siting, base watering, and compact cultivars like Little Red Robin and Carre Rouge now let gardeners enjoy the color with far less disease pressure.
Red Tip Photinia: did you know?
Fascinating facts about Red Tip Photinia
Red tip photinia is a hybrid of Photinia glabra and Photinia serratifolia that arose as a chance seedling at Fraser Nursery in Birmingham, Alabama, in the 1940s, and it was named after the nursery when it was introduced to the trade in the 1950s.
Red Tip Photinia questions, answered
When should I plant Red Tip Photinia?
What are good companion plants for Red Tip Photinia?
What hardiness zones can Red Tip Photinia grow in?
How much sun does Red Tip Photinia need?
How far apart should I space Red Tip Photinia?
What pests and diseases affect Red Tip Photinia?
What are the best Red Tip Photinia varieties to grow?
What soil does Red Tip Photinia need?
Why has my photinia hedge lost its red color?
How far apart should I plant photinia for a hedge?
What causes red and dark spots on photinia leaves?
Is red tip photinia frost hardy?
Can I grow photinia in a container?
Is photinia toxic to pets or children?
Plant these alongside Red Tip Photinia
More Evergreens
Grow your best Red Tip Photinia yet — and everything around it.
Start a free plan today. Lay out your beds, drop in your Red Tip Photinia, and let PlotMyGarden handle the timing, spacing, companions and reminders from seed to harvest basket.
