Cauliflower
A demanding brassica that requires consistent cool temperatures and moisture to form tight, white curds.


On this pageOverview
Meet Cauliflower
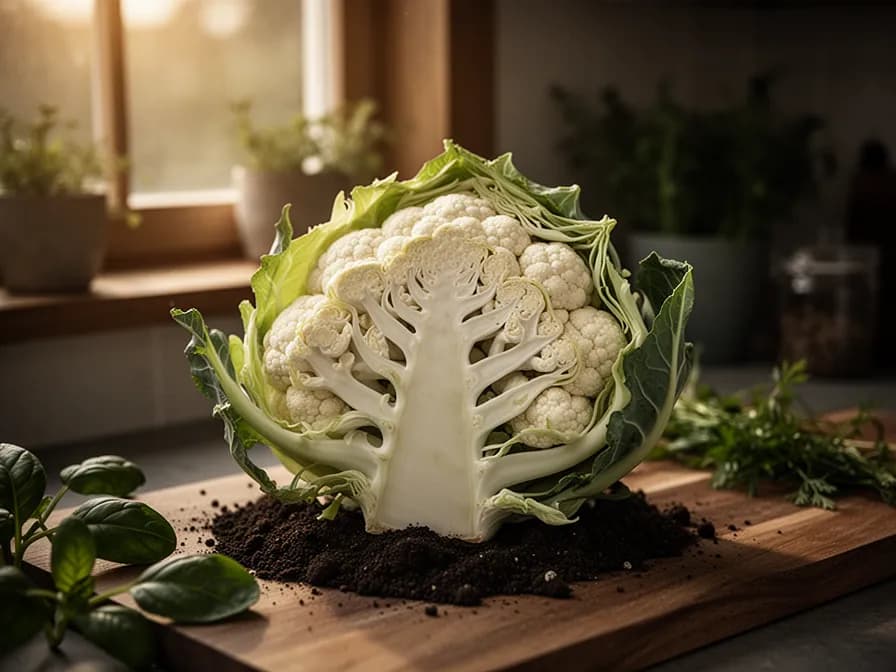
A demanding brassica that requires consistent cool temperatures and moisture to form tight, white curds. Blanch the developing head by folding outer leaves over the curd and securing them to prevent yellowing from sun exposure. Cauliflower is sensitive to temperature swings, which can cause the curd to become ricey or discolored. Harvest promptly when heads are firm and compact, before the florets begin to separate and loosen.
When to plant Cauliflower
Start cauliflower seeds indoors 6-8 weeks before the last frost date for spring harvest, or 10-12 weeks before the first fall frost for autumn planting. Use cell trays or small pots filled with sterile, well-draining seed-starting mix. Sow seeds 6mm (1/4 inch) deep and lightly firm the surface. Maintain soil temperature at 18-21°C (65-70°F) for germination, which typically occurs in 5-10 days. Bottom heat from a seedling mat speeds germination significantly but should be removed as soon as seedlings emerge.
After germination, immediately move seedlings to cooler conditions — 15-18°C (60-65°F) day and 10-13°C (50-55°F) night — to develop the stocky, compact transplants that perform best in the garden. Leggy cauliflower seedlings from warm, dim conditions never catch up and often produce poor-quality curds. Provide 12-14 hours of bright light daily using grow lights positioned 5-8 cm above the foliage, adjusting height as plants grow. Feed weekly with quarter-strength balanced liquid fertilizer once the first true leaves appear. Transplant into individual 8 cm pots when seedlings develop 2-3 true leaves to prevent root binding.
Harden off gradually over 7-10 days by moving transplants outdoors for increasing periods, starting with 2 hours in dappled shade and working up to full-day sun exposure. This critical step is where many cauliflower crops fail — insufficiently hardened transplants suffer severe shock that triggers buttoning (premature tiny head formation). However, avoid exposing young transplants to temperatures below 5°C (41°F) for extended periods during hardening off, as prolonged cold on immature plants is the primary cause of buttoning. Cauliflower is uniquely unforgiving among vegetables in this respect: any interruption in growth — cold shock, heat stress, drought, root disturbance, or nutrient deficiency — at the seedling stage can permanently compromise curd quality weeks later.
For fall planting, the challenge is starting seeds in the heat of midsummer. Sow in a cool, shaded location or indoors under lights with air conditioning. Use bottom watering to prevent damping off in warm, humid conditions. Fall cauliflower seedlings benefit from being slightly larger and more robust at transplanting time than spring seedlings, as they face the stress of late-summer heat before the cooling temperatures they prefer arrive.
We watch the calendar so you don't have to
Tell us where you garden once. We line your sow and harvest windows up with your local season — and nudge you the moment each one opens.
See your exact Cauliflower dates
Share your location once and we'll line every sow and harvest date up with your real local season — not a generic seed-packet guess.
Used once to set your season · never sharedHow to grow Cauliflower
Cauliflower is considered the most challenging brassica for home gardeners because it demands consistently cool temperatures, steady moisture, and uninterrupted growth to form high-quality curds. Start seeds indoors 6-8 weeks before the last frost date, sowing 6mm (1/4 inch) deep at 18-21°C (65-70°F). Transplant hardened-off seedlings outdoors around the last frost date, spacing plants 60 cm apart in rows 75 cm apart. Cauliflower performs poorly when growth is interrupted by cold snaps, heat waves, drought, or nutrient deficiency.
Choose a location with full sun (at least 6 hours daily) and rich, well-drained soil amended with generous amounts of compost. Cauliflower is a heavy feeder that demands a steady nutrient supply from transplant through harvest. Set transplants at the same depth they grew in their pots, and water with a dilute starter fertilizer to minimize transplant shock. For fall harvest — often more successful than spring because temperatures cool rather than warm during curd development — transplant seedlings in midsummer.
Water deeply and consistently, providing 2.5-4 cm (1-1.5 inches) per week through drip irrigation. Even brief drought stress can cause curds to become loose, ricey, or discolored. Mulch heavily with 5-8 cm of straw to maintain even soil moisture and moderate temperature. When the white curd reaches 5-7 cm in diameter, blanch it by gently folding the large outer leaves over the head and securing with a rubber band or clothespin — this shields the curd from sunlight, preventing yellowing and preserving the snowy white color. Self-blanching and colored varieties do not require this step.
The bed planner spaces every plant for you
Pick a bed size and PlotMyGarden spaces your Cauliflower at 60 cm, counts how many fit, and lays the block out before you buy a single seed.
Cauliflower's best neighbours
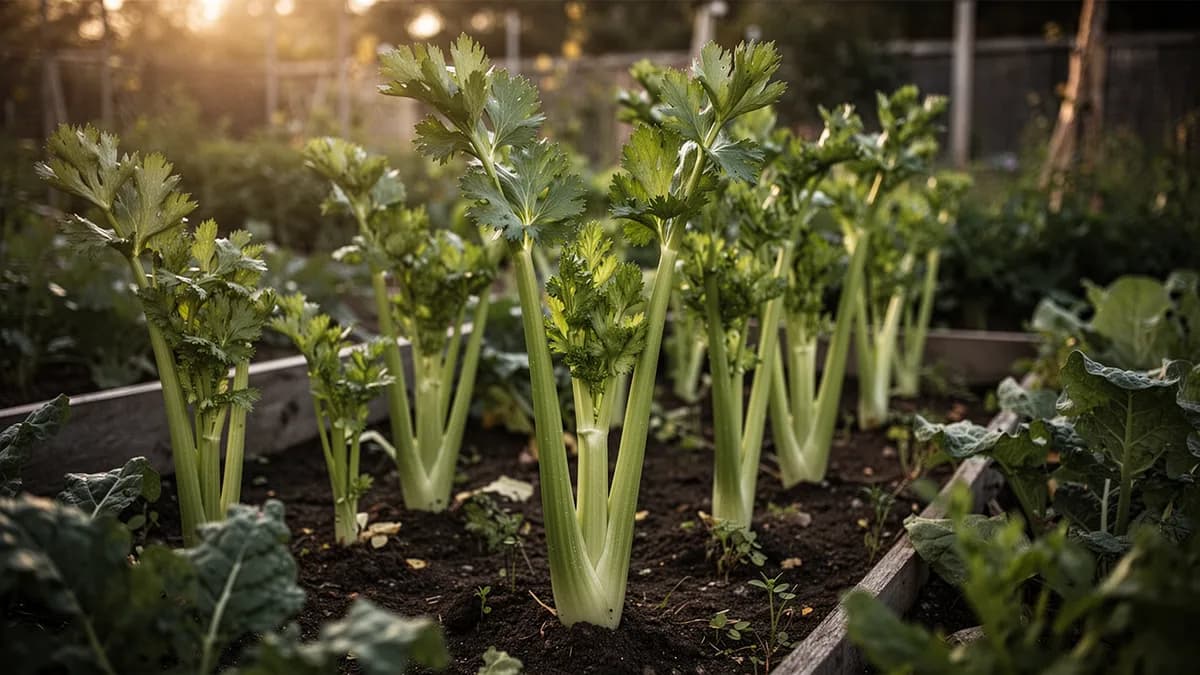
Celery is cauliflower's most valuable companion plant — its strong, persistent aromatic scent confuses the white cabbage butterfly (Pieris rapae), significantly reducing the egg-laying that leads to devastating caterpillar damage. Plant celery in alternating rows with cauliflower, or use it as a border around cauliflower beds. The two crops have compatible water and nutrient requirements, making bed management straightforward. Dill, chamomile, and yarrow planted nearby attract parasitic wasps and hoverflies that prey on cabbage worms and aphids.
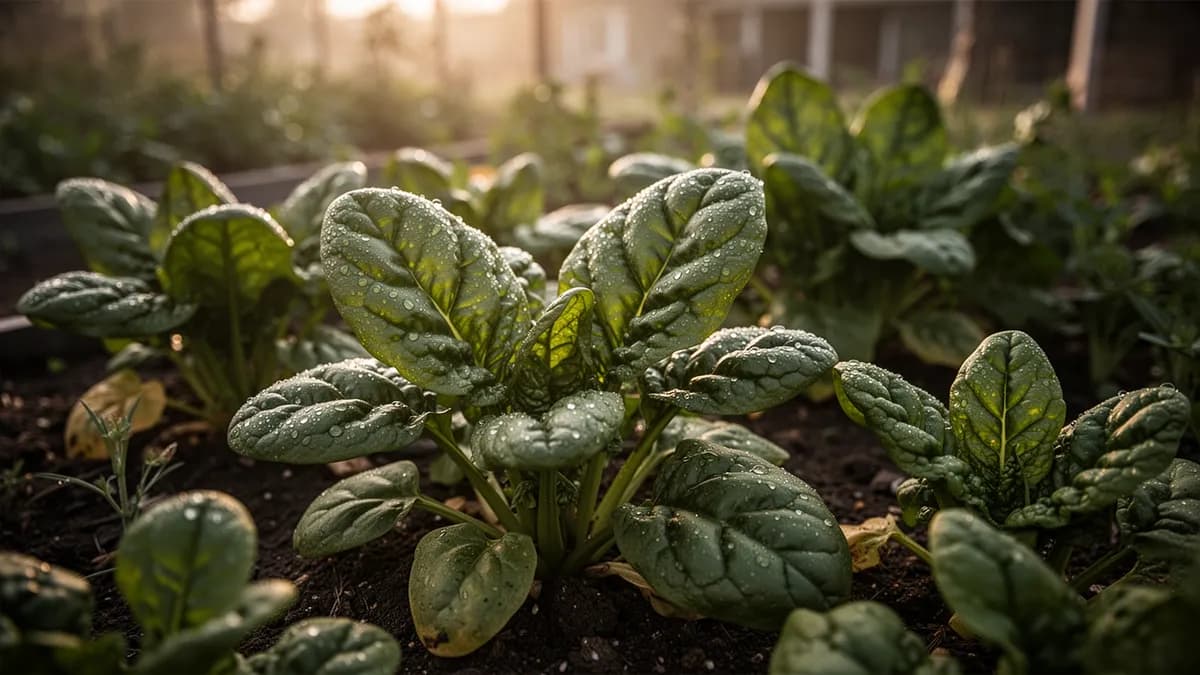
Spinach and lettuce serve as excellent living mulches beneath cauliflower plants during the early growing season, keeping the soil cool and moist while making productive use of garden space before the cauliflower canopy fills in and shades them out. These quick-maturing crops are typically harvested before they compete with the cauliflower for light. Beets and Swiss chard are also compatible understory crops that thrive in the partial shade cast by cauliflower's large leaves.
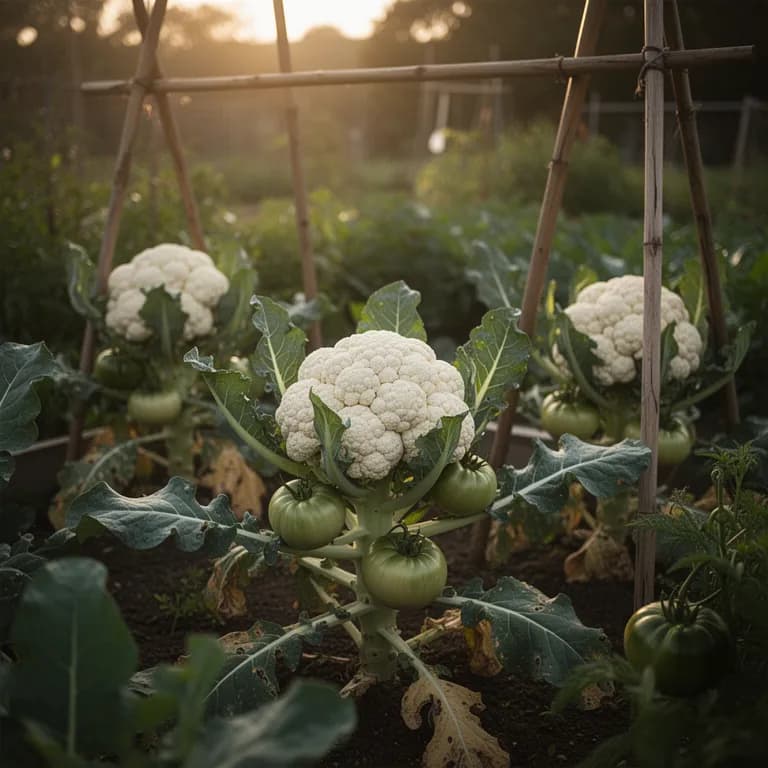
Peas and beans planted as preceding crops fix atmospheric nitrogen in the soil through their root nodule bacteria, providing a natural fertility boost for the heavy-feeding cauliflower that follows. After pea harvest, cut the vines at soil level (leaving roots and their nitrogen-fixing nodules in place) and transplant cauliflower directly into the enriched bed. Onions, garlic, and chives planted among cauliflower deter aphids and flea beetles with their sulfurous compounds. Avoid planting cauliflower near tomatoes, which compete aggressively for nutrients and attract shared pests like aphids and whiteflies. Strawberries should also be kept distant, as they share susceptibility to Verticillium wilt and other soilborne diseases. Never follow cauliflower with another brassica — wait at least 3-4 years before replanting any cabbage family crop in the same location to prevent clubroot and other soilborne disease buildup.
It flags clashes before you plant, not after
Every plant you place is checked against its neighbours in real time. Good matches glow green; conflicts get flagged on the spot — so a season-wrecking mistake never makes it into the ground.
Feed it well
Cauliflower demands rich, fertile soil with a pH of 6.0-7.0 and high organic matter content — it is arguably the heaviest-feeding vegetable in the home garden and punishes nutrient deficiency with small, loose, or discolored curds. Incorporate 8-10 cm of well-aged compost into the top 30 cm of soil before planting, and consider adding an additional shovelful of aged compost directly into each planting hole. The soil should hold moisture well but drain freely — cauliflower roots rot quickly in waterlogged conditions, yet the plant wilts rapidly in drought. Raised beds with compost-enriched soil offer the ideal balance of drainage, fertility, and moisture retention.
Apply a balanced slow-release fertilizer (10-10-10) at planting time, then begin side-dressing with nitrogen-rich amendments every 2-3 weeks once plants are established. Blood meal (12-0-0), fish emulsion (5-1-1), or feather meal (13-0-0) are excellent nitrogen sources for the heavy vegetative growth phase. As curds begin forming, reduce nitrogen slightly and increase potassium and phosphorus to support curd quality and density. Excessive nitrogen during curd formation can produce large, leafy plants with small, ricey curds.
Micronutrient management is critical for cauliflower and often overlooked by home gardeners. Boron deficiency is the most common micronutrient issue, causing brown, water-soaked hollows in stems and curds and a distinctly bitter flavor. Apply 1 tablespoon of borax dissolved in 4 liters of water per 10 meters of row once mid-season as a preventive measure. Molybdenum deficiency causes a distinctive condition called whiptail — leaves become extremely narrow, strap-like, and distorted. Calcium deficiency causes internal tip burn (brown, dry leaf margins on inner wrapper leaves). A soil test before planting is strongly recommended, as cauliflower's demanding nutrient requirements make it particularly sensitive to soil imbalances that other vegetables tolerate without issue.
Ideal Temperature
Hardiness Zone Compatibility
From seed to harvest, stage by stage
Seed Germination
Cauliflower seeds germinate in 5-10 days at optimal temperatures of 18-21°C. Seeds are small, round brassica seeds nearly identical to broccoli and cabbage. Seedlings emerge with a pair of rounded cotyledons that give way quickly to broader true leaves.
Seedling Development
Seedlings develop broad, blue-green true leaves and a sturdy central stem. Growth is steady under cool, bright conditions. This is the critical indoor phase where the plant's future curd quality is largely determined — any stress now causes problems weeks later.
Transplant & Establishment
After careful hardening off, seedlings are transplanted into richly composted garden soil. The plant establishes its root system and begins rapid leaf expansion. Large, healthy leaves during this phase are essential for shading and protecting the future curd.
Vegetative Growth
The plant develops a large rosette of broad, waxy leaves that form a natural cup shape around the growing point. Vigorous leaf growth is essential — the outer leaves will later be used to blanch and protect the developing curd. The thick central stem stores nutrients for the demanding curd formation phase.
Curd Formation
The central growing point transitions from leaf production to forming the curd — a dense mass of undeveloped flower buds. The curd grows rapidly under ideal cool conditions, doubling in size every few days. White varieties must be blanched when the curd reaches 5-7 cm to maintain their snowy color.
Harvest
The curd reaches full size (15-20 cm) with a smooth, dense surface and tightly packed florets. The harvest window is very narrow — just 2-5 days — before florets begin separating and quality drops sharply. Cut the stem 10 cm below the head with a sharp knife.
Sow 6mm deep in sterile seed-starting mix. Use a seedling heat mat to maintain consistent soil temperature, but remove it immediately after emergence — warmth after germination produces weak, leggy seedlings that never recover fully.

Caring for Cauliflower month by month
What to do each month for your Cauliflower
July
You are hereStart fall cauliflower seeds indoors in a cool location — midsummer heat is the biggest challenge. Keep seedlings cool under lights or in air-conditioned space. Water from the bottom to prevent damping off. Fall cauliflower often outperforms spring because curds form in cooling rather than warming weather.
Harvesting Cauliflower
Harvest cauliflower when the curd is full-sized (15-20 cm / 6-8 inches in diameter), firm, compact, and the florets are still tightly closed. Do not wait for the head to reach its maximum potential size — once individual florets begin to separate, the head is past peak and quality deteriorates rapidly. The ideal harvest window for most varieties is just 2-5 days, making daily monitoring essential once curds begin sizing up. Cut the stem about 10 cm below the head with a sharp, clean knife, keeping a few wrapper leaves attached to protect the curd during handling and transport.
Timing your harvest correctly requires understanding the visual and tactile cues of a ready curd. The surface should feel dense and smooth when you press gently — any graininess or sponginess indicates the curd is past its prime. White varieties should be uniformly snowy white without yellowing, browning, or purple tinting (though purple tinting from cold is safe to eat). Colored varieties like Graffiti (purple) and Cheddar (orange) should display their deepest, most vibrant pigmentation at peak maturity. Romanesco should have well-defined, crisp fractal points without softening.
Unlike broccoli, most cauliflower varieties do not produce a useful secondary harvest of side shoots, so the plant can be pulled after the main head is cut. A few varieties like Fioretto and some sprouting types produce small secondary florets, but yields are modest. Harvest in the cool of early morning for maximum crispness and the longest possible post-harvest shelf life. In hot weather, move harvested heads immediately into shade and refrigeration — cauliflower quality degrades quickly above 25°C. If you notice the outer florets beginning to separate or the surface becoming fuzzy, harvest immediately regardless of size, as flavor and texture decline rapidly past this point.
We count the days and tell you when to pick
Tell us when you planted and PlotMyGarden tracks the 75-day countdown to harvest, then pings you the day your Cauliflower is ready.
Storage & Preservation
Fresh cauliflower stores in the refrigerator for 1-2 weeks when wrapped loosely in a damp cloth or placed inside a perforated plastic bag in the crisper drawer. Leave the wrapper leaves attached — they protect the curd from moisture loss and physical damage. Do not wash before storing, as residual moisture promotes mold growth on the tightly packed florets. Store stem-side up to prevent condensation pooling in the curd surface. If brown spots appear on the surface, trim them away — the remaining curd is still perfectly good if it feels firm.
For freezing, break the head into uniform 3-4 cm florets, discarding the tough central core. Blanch for exactly 3 minutes in boiling water with a tablespoon of lemon juice or white vinegar added per liter (this preserves the white color and prevents the sulfurous off-flavors that develop in unblanched frozen cauliflower). Immediately plunge into ice water for 3 minutes, drain thoroughly on clean towels, then freeze in a single layer on a parchment-lined baking sheet before transferring to freezer bags. Properly blanched and frozen cauliflower maintains excellent quality for 10-12 months.
Cauliflower pickled in spiced vinegar brine with turmeric, mustard seeds, and garlic is a classic condiment in many cuisines — Italian giardiniera, Indian achar, and Middle Eastern torshi all feature pickled cauliflower prominently. For longer preservation, pressure-can cauliflower in pint jars at 10 PSI for 30 minutes (never water-bath can, as cauliflower is a low-acid vegetable). Dehydrated cauliflower can be ground into a versatile powder for thickening soups and sauces, or riced and frozen in pre-portioned bags for instant low-carb cauliflower rice — one of the most popular modern uses that has driven cauliflower prices up dramatically in recent years.
For short-term storage of a few days, cauliflower can be broken into florets and stored in a container of cold water in the refrigerator — change the water daily. This keeps the florets ultra-crisp for crudité platters, but nutrients leach slowly into the water, so this method is best for presentation rather than maximum nutrition.
What goes wrong — and the fix
Cabbage Worm
PestGreen caterpillars feeding on leaves and burrowing into the developing curd, leaving dark frass droppings. White butterflies circling plants indicate active egg-laying. Damage to curds makes them unmarketable and can allow decay organisms to enter.
Clubroot
DiseasePlants wilt in warm weather despite adequate moisture. Roots become grotesquely swollen and distorted. Growth becomes severely stunted and plants may die. The soilborne pathogen can persist for 15+ years.
Black Leg
DiseaseGrayish-white, sunken cankers on stems near the soil line with dark borders and tiny black dots (pycnidia). Affected stems become girdled, causing plants to wilt and topple. Seedlings may develop dark lesions on cotyledons and stems.
Aphids
PestDense colonies of gray-green waxy aphids on leaf undersides and within developing curds. Leaves become cupped and yellowed. Heavy infestations stunt growth and contaminate curds with honeydew and sooty mold.
Troubleshooting Common Problems
Ricey or grainy curds — the most frustrating cauliflower problem — are caused by heat stress, drought, or any interruption in steady growth. The curd surface develops a rough, granular texture instead of the smooth, dense surface that signals quality. Prevention is entirely about maintaining uninterrupted growth: consistent soil moisture (never letting the soil dry out, even briefly), steady nutrition (side-dress every 2-3 weeks), and timing maturity for cool weather (15-21°C). Once a curd turns ricey, there is no remedy — harvest and use immediately, as quality only degrades further.
Brown or yellow curds on white varieties result from sun exposure during curd development. Traditional white cauliflower requires blanching: when the curd reaches 5-7 cm diameter, gently fold the large outer leaves over the head and secure with a rubber band, clothespin, or soft twine. Check every few days and readjust as the curd expands. Self-blanching varieties like Snowball Self-Blanching have leaves that naturally curl inward, and colored varieties (purple, orange, green) do not require blanching at all.
Buttoning — the premature formation of tiny, golf-ball-sized curds on undersized plants — is triggered by cold stress on young transplants exposed to temperatures below 5°C for extended periods, transplant shock from rough handling or root disturbance, or severe nutrient deficiency during early growth. Once buttoning occurs, the plant will not produce a normal-sized head. Prevention involves careful hardening off, avoiding premature transplanting into cold soil, and maintaining steady nutrition from the start.
Loose, spreading curds indicate either that the head was left on the plant too long past maturity, or that the curd formed during warm weather above 27°C. Daily monitoring is essential during the harvest window, which can be as short as 2-3 days in warm conditions. Hollow stems with brown, water-soaked cavities indicate boron deficiency — apply borax solution preventively at mid-season rather than waiting for symptoms to appear.
Purple-tinged curds on white varieties develop from cold temperature exposure and are completely safe to eat — they actually contain bonus anthocyanin antioxidants. However, if aesthetics matter, blanching more thoroughly or choosing frost-protected planting times will prevent the discoloration.
Growing Tips
- Fall cauliflower almost always outperforms spring cauliflower — curds form as temperatures cool rather than warm, producing tighter, smoother, better-colored heads with fewer pest problems. Prioritize your fall planting if you can only grow one season.
- If blanching feels tedious, grow self-blanching varieties (Snowball Self-Blanching, Amazing) whose inner leaves naturally curl over the curd, or colored varieties (Graffiti, Cheddar, Romanesco) that don't need blanching at all.
- Never let cauliflower seedlings become growth-checked — any interruption from cold, heat, drought, or nutrient deficiency at the seedling stage causes buttoning (premature tiny heads) or ricey curds weeks later. Cauliflower is uniquely unforgiving in this respect.
- Boron deficiency is the sneaky cauliflower killer that most gardeners don't test for. Prevent brown, hollow stems and bitter-tasting curds by applying 1 tablespoon of borax in 4 liters of water per 10 meters of row at mid-season.
- Cauliflower has the narrowest harvest window of any common vegetable — just 2-5 days between perfect and past-prime. Check daily once curds begin sizing up and harvest the moment the surface is smooth, dense, and 15-20 cm across.
- Interplant celery between cauliflower rows — its strong aromatic scent confuses the white cabbage butterfly and dramatically reduces caterpillar damage without any spraying required.
- For the whitest curds on traditional varieties, blanch when the curd reaches just 5-7 cm — don't wait until it's larger. Tie leaves loosely enough to allow air circulation, which prevents moisture-related diseases inside the leaf canopy.
- Cauliflower is the most water-demanding brassica. Install drip irrigation and mulch 5-8 cm deep with straw — even brief drought stress during curd formation causes irreversible quality damage.
- Try growing Romanesco for its incredible fractal beauty and milder, nuttier flavor — it's slightly easier than white cauliflower and makes a spectacular presentation vegetable that amazes guests.
- Rotate cauliflower with non-brassica crops on a strict 3-4 year cycle. Clubroot spores persist in soil for 15+ years, and once established, this devastating disease makes brassica growing virtually impossible without raised beds and imported soil.
Pick your Cauliflower
Snowball Self-Blanching
A reliable, early-maturing variety with inner leaves that naturally curl over the curd, eliminating the need for manual blanching. 55 days. Compact plants with smooth, white, 15 cm heads.
Graffiti
A striking purple variety rich in anthocyanin antioxidants that retains its vivid color when lightly cooked. 80 days. The purple hue intensifies with cool weather exposure. No blanching needed.
Cheddar
A vibrant orange variety with high beta-carotene content that deepens in color when cooked. 68 days. Mild, slightly nutty flavor. The orange color holds up well through freezing and cooking.
Romanesco
A breathtaking variety with lime-green, fractal-patterned spiraling pointed florets. 75-100 days. Milder and nuttier flavor than white cauliflower. A showstopping presentation vegetable.
Amazing
A widely adapted hybrid with excellent heat tolerance for challenging spring conditions. Large, dense, bright white curds with heavy wrapper leaves that assist with self-blanching. 68 days.
A $3-4 seed packet produces 50-80 cauliflower plants, each yielding a single head weighing 600g-1.2 kg at maturity. Organic cauliflower sells for $4-7 per head at retail, and colored varieties (purple, orange, Romanesco) often command $6-9 each. With 8-12 well-managed plants across spring and fall seasons, a family can grow $40-100+ worth of premium cauliflower annually — and home-grown cauliflower, harvested at peak freshness, is dramatically superior in flavor and texture to store-bought heads that may be 1-2 weeks old.
Quick recipes

Whole Roasted Cauliflower with Spiced Butter
50 minA showstopping vegetarian centerpiece — an entire cauliflower head rubbed with aromatic spiced butter and roasted until golden and caramelized. Dramatic enough for a dinner party, simple enough for a weeknight.
9 ingredients
Cauliflower Rice Stir-Fry
20 minThe low-carb classic that launched a thousand diets — cauliflower pulsed into rice-sized grains and stir-fried with vegetables and soy sauce. Virtually indistinguishable from rice when seasoned properly.
9 ingredientsCrispy Cauliflower Bites with Tahini Dip
35 minCauliflower florets roasted at high heat until deeply golden and crispy, served with a creamy tahini-lemon dip. A Middle Eastern-inspired appetizer or snack that disappears in minutes.
10 ingredientsCulinary Uses
Cauliflower has undergone a remarkable culinary renaissance, transforming from a bland, boiled side dish into one of the most versatile and trendy vegetables in contemporary cooking. Its neutral, mildly sweet flavor and unique ability to absorb seasonings and mimic other textures have made it a cornerstone of low-carb, keto, paleo, and plant-based cuisines. Riced cauliflower (pulsed in a food processor until grain-sized) serves as a convincing substitute for rice, couscous, and tabbouleh. Mashed cauliflower with butter and cream rivals mashed potatoes in richness while dramatically reducing carbohydrates. Cauliflower pizza crust, cauliflower gnocchi, and cauliflower bread have become mainstream grocery items.
Roasting transforms cauliflower more dramatically than perhaps any other vegetable. Tossed with olive oil and roasted at 220°C (425°F) until deeply caramelized, cauliflower develops intensely nutty, almost meaty flavors with sweet, charred edges. A whole roasted cauliflower — rubbed with spiced butter, harissa, or tandoori paste and roasted until golden — makes a stunning vegetarian centerpiece. Cauliflower steaks (thick cross-sections through the center of a head) seared and finished in the oven are a popular plant-based main course in restaurants worldwide.
Cauliflower is a natural partner for bold spices and rich sauces. Indian aloo gobi (cauliflower with potatoes and spices) is a beloved classic. Middle Eastern preparations feature cauliflower deep-fried and drizzled with tahini, lemon, and herbs. Cauliflower cheese (baked in béchamel with sharp cheddar) is a British comfort food staple. The vegetable pairs exceptionally with curry powder, cumin, turmeric, garlic, Parmesan, sharp cheddar, brown butter, capers, anchovies, pine nuts, raisins, and preserved lemon. Raw cauliflower florets are excellent for crudité platters, shaved thin into salads, or marinated in vinaigrette for a tangy, crunchy side.
What's inside
Health Benefits
- Extremely low in calories (25 per 100g) and carbohydrates (5g per 100g), making cauliflower the ideal foundation for low-carb, keto, and weight management diets — it provides bulk and satisfaction without significant caloric impact
- Contains sulforaphane and indole-3-carbinol, glucosinolate compounds that activate the body's Phase II detoxification enzymes and have demonstrated protective effects against colon, breast, prostate, and bladder cancers in extensive research
- One of the best plant sources of choline (45 mg per 100g), an essential nutrient critical for brain function, memory, mood regulation, liver health, and proper cell membrane structure that most people don't consume enough of
- Rich in vitamin C (80% DV per 100g) which supports immune defense, collagen synthesis for skin and joint health, iron absorption from plant foods, and acts as a potent antioxidant protecting cells from oxidative damage
- High fiber content combined with glucosinolates supports digestive health by feeding beneficial gut bacteria and protecting the gastrointestinal lining — regular cruciferous vegetable consumption is associated with reduced risk of colorectal issues
- Anti-inflammatory properties from vitamin C, beta-carotene (in orange varieties), anthocyanins (in purple varieties), and omega-3 fatty acids help modulate chronic inflammation associated with heart disease, diabetes, and autoimmune conditions
Where Cauliflower comes from
Cauliflower (Brassica oleracea var. botrytis) evolved from the same wild cabbage ancestor as broccoli, kale, and Brussels sprouts through centuries of selective breeding in the Mediterranean region. The earliest recognizable cauliflower varieties emerged in the eastern Mediterranean around the 6th century AD, with Arab botanists documenting 'flowering cabbage' cultivation in what is now Syria and Turkey. Arab traders introduced cauliflower to Spain during the Moorish period, and from there it spread gradually across Europe during the 12th-15th centuries.
Cauliflower reached Italy and France by the 16th century, where it quickly became a prized luxury vegetable among the aristocracy. French and Italian horticulturists developed the blanching technique — tying outer leaves over the developing curd — to produce the pure white heads preferred by wealthy tables. King Louis XIV reportedly demanded cauliflower at every royal dinner, and the vegetable featured prominently in the elaborate cuisine of the French court. English gardeners adopted cauliflower in the 17th century, and it crossed the Atlantic with European colonists in the 1700s.
For most of its history, cauliflower was considered a difficult, temperamental crop suited mainly to cool maritime climates. The development of heat-tolerant hybrids in the 20th century expanded its range dramatically, and the breeding of self-blanching, purple, orange, and green varieties has transformed cauliflower from a finicky white vegetable into a versatile, colorful family of crops. The early 21st century brought an extraordinary cauliflower boom driven by low-carb diet trends — cauliflower rice, cauliflower pizza crust, and cauliflower mash became grocery store staples, driving global production past 27 million tonnes annually and elevating this humble brassica to superfood status.
Cauliflower: did you know?
Fascinating facts about Cauliflower
Mark Twain famously described cauliflower as 'nothing but cabbage with a college education' — a surprisingly accurate botanical observation, as cauliflower and cabbage are indeed the same species (Brassica oleracea), just different cultivar groups selected over centuries for different traits.
Cauliflower questions, answered
When should I plant Cauliflower?
What are good companion plants for Cauliflower?
What hardiness zones can Cauliflower grow in?
How much sun does Cauliflower need?
How far apart should I space Cauliflower?
What pests and diseases affect Cauliflower?
How do I store Cauliflower after harvest?
What are the best Cauliflower varieties to grow?
What soil does Cauliflower need?
Why is my cauliflower curd ricey and grainy instead of smooth?
Why are my cauliflower curds turning yellow or brown?
Why did my cauliflower form a tiny head on a small plant (buttoning)?
Is purple cauliflower natural or genetically modified?
Can I grow cauliflower in containers?
What's the difference between cauliflower and Romanesco?
You just read the theory. Now grow it on autopilot.
Everything that makes Cauliflower fiddly — the timing, the spacing, the companions, the harvest window — is exactly what PlotMyGarden handles for you, for every plant in your garden.
A plan that knows your weather
Set your location once. Get sow, feed and harvest dates built around your real last-frost date and live forecast — no more guessing from a generic seed packet.
From the “When to plant” sectionDrag-and-drop bed planner
Design beds on a grid. Every plant snaps to its proper spacing, and you can see your whole season laid out before you spend a cent on seed.
From the “Growing guide” sectionCompanion conflicts, caught early
200+ good-and-bad pairings checked live as you plant — so a season-wrecking mistake never makes it into the ground.
From the “Companions” sectionReminders you'll actually act on
“Water the beans.” “Pick today before it turns.” Timely, specific, and tied to the plants you're really growing.
From the “Harvest” sectionSuccession, scheduled
Want a harvest for six weeks, not six days? It spaces your sowings automatically and reminds you when each new block is due.
From the “When to plant” sectionA record that gets smarter
Every harvest you log teaches it your garden. Next year's plan starts from what actually worked in your soil, not a textbook's.
From the “Overview” sectionPlant these alongside Cauliflower

More Cruciferous


Keep Cauliflower away from these


Grow your best Cauliflower yet — and everything around it.
Start a free plan today. Lay out your beds, drop in your Cauliflower, and let PlotMyGarden handle the timing, spacing, companions and reminders from seed to harvest basket.