Camassia
Un majestuoso bulbo norteamericano que produce altas espigas de flores estrelladas en azul, violeta o blanco, y prospera en prados húmedos y suelos arcillosos donde otros bulbos fracasan.


En esta páginaResumen
Conoce Camassia
Un majestuoso bulbo norteamericano que produce altas espigas de flores estrelladas en azul, violeta o blanco, y prospera en prados húmedos y suelos arcillosos donde otros bulbos fracasan. La camassia es uno de los mejores bulbos para naturalizar en praderas húmedas y jardines de lluvia. Plántela en grupos generosos para lograr un espectáculo impresionante a finales de primavera.
Cuándo plantar Camassia
La camassia se reproduce con facilidad a partir de semillas sembradas en otoño en suelo húmedo y rico en humus, o en macetas con sustrato a base de marga. Siembre las semillas a unos 6 mm de profundidad y mantenga una humedad constante durante el invierno y la primavera. Las semillas requieren un periodo de estratificación fría para germinar y normalmente brotan en su primera primavera. Cultive las plántulas en macetas durante dos años antes de trasplantarlas a sus ubicaciones definitivas. Las plantas obtenidas de semilla alcanzan el tamaño de floración en tres a cuatro años.
Vigilamos el calendario para que tú no tengas que hacerlo
Dinos una vez dónde cultivas. Ajustamos tus ventanas de siembra y cosecha a tu temporada local — y te avisamos en cuanto se abre cada una.
Mira tus fechas exactas de Camassia
Comparte tu ubicación una vez y ajustaremos cada fecha de siembra y cosecha a tu temporada local real — no a un sobre genérico.
Se usa una vez para fijar tu temporada · nunca se comparteCómo cultivar Camassia
Plante los bulbos de camassia en otoño, enterrándolos a una profundidad de 10 a 15 cm y separándolos unos 15 cm entre sí, en un suelo que retenga la humedad y permanezca húmedo durante la primavera. A diferencia de la mayoría de los bulbos, la camassia prospera en arcilla pesada y zonas con drenaje deficiente donde otros bulbos se pudrirían, lo que la convierte en un recurso inestimable para jardines de lluvia, riberas de arroyos y prados bajos. Elija un lugar a pleno sol o en sombra ligera con humedad fiable en primavera.
Riegue de forma constante durante la temporada de crecimiento, especialmente en primaveras secas, cuando los bulbos están creciendo activamente y floreciendo. La camassia tolera inundaciones estacionales y es uno de los pocos bulbos ornamentales que realmente prefiere condiciones pantanosas. Aplique un acolchado de compost en otoño para mantener la humedad del suelo y aportar nutrientes.
Permita que el follaje se marchite de forma natural tras la floración, lo que suele tardar unas seis semanas. Las hojas en proceso de maduración canalizan la energía de vuelta al bulbo para la exhibición del año siguiente. Una vez en letargo, la camassia tolera la sequedad estival sin problemas. Divida las matas congestionadas en otoño cada cuatro o cinco años para mantener el vigor y favorecer espigas florales más grandes.
El planificador espacia cada planta por ti
Elige un tamaño de bancal y PlotMyGarden espacia tu Camassia a 15 cm, cuenta cuántas caben y lo distribuye antes de comprar una sola semilla.
Los mejores vecinos de Camassia
La camassia es magnífica naturalizada en prados húmedos junto a narcisos, fritilarias cabeza de serpiente y gramíneas amantes de la humedad. En borduras, combínela con iris, hostas y helechos que llenarán el espacio a medida que el follaje de la camassia se desvanece. Las altas espigas florales aportan contraste vertical frente a las prímulas y las caléndulas palustres de porte bajo. Evite plantar cerca de coberturas vegetales agresivas que podrían sofocar los bulbos.
Detecta conflictos antes de plantar, no después
Cada planta que colocas se comprueba contra sus vecinas en tiempo real. Las buenas combinaciones brillan en verde; los conflictos se marcan al instante — para que un error que arruine la temporada nunca llegue a la tierra.
Abónalo bien
La camassia es uno de los pocos bulbos que sobresale en suelo arcilloso pesado y con buena retención de humedad, con un pH de 5.5 a 7.0. Tolera suelos con drenaje deficiente e inundaciones estacionales que acabarían con la mayoría de los bulbos. Aplique anualmente una capa gruesa de compost o mantillo de hojas bien descompuesto en otoño para mantener la fertilidad y la estructura del suelo. Una aplicación primaveral de fertilizante granulado equilibrado esparcido alrededor del follaje emergente favorece un crecimiento vigoroso y una floración abundante.
Temperatura ideal
Compatibilidad de zonas de rusticidad
De la semilla a la cosecha, etapa por etapa
Letargo invernal y activación radicular
Los bulbos de camassia permanecen en reposo bajo la superficie del suelo durante el invierno, protegidos por una túnica papíracea oscura. Durante este periodo, el sistema radicular comienza a extender silenciosamente finas raíces alimentadoras en el suelo circundante a medida que aumentan los niveles de humedad. El bulbo contiene reservas de energía almacenadas de la temporada de crecimiento anterior, principalmente en forma de inulina, un carbohidrato fructano complejo que también confiere a los bulbos su valor alimenticio. Bajo tierra, el brote embrionario y el botón floral de la próxima temporada ya están formados dentro del bulbo.
Emergencia foliar primaveral
A medida que la temperatura del suelo supera los 7-10 °C, las hojas esbeltas y herbáceas empujan a través de la superficie en una roseta basal compacta. El follaje es liso, ligeramente aquillado y mide entre 30 y 60 cm de longitud según la especie y las condiciones de cultivo. Las hojas son de un verde fresco y pueden confundirse inicialmente con gramíneas ornamentales o incluso con follaje de ajo silvestre. La fase de crecimiento foliar es esencial para la fotosíntesis, que recarga el bulbo con energía para la floración y el posterior letargo.
Desarrollo de la espiga floral
Un único tallo floral robusto se alza desde el centro de la roseta de hojas, creciendo rápidamente hasta los 40-100 cm de altura según la especie. El tallo es grueso y erguido, coronado por un racimo que se alarga gradualmente con capullos florales verdes densamente agrupados. A medida que el racimo se extiende, los capullos individuales se hacen visibles y comienzan a mostrar color en la base de la espiga. Los capullos inferiores se desarrollan primero mientras los superiores continúan formándose, asegurando un periodo de floración prolongado.
Floración plena
La espectacular exhibición floral comienza cuando los capullos más bajos del racimo se abren primero, revelando flores estrelladas de seis tépalos en tonos de azul, violeta, púrpura o blanco según la especie y el cultivar. Las flores se abren secuencialmente hacia arriba a lo largo de la espiga durante un periodo de dos a tres semanas, creando un hermoso efecto graduado con flores abiertas abajo y capullos arriba. Cada flor individual dura varios días. Las flores producen néctar y son visitadas por una amplia variedad de polinizadores, incluyendo abejas, mariposas y sírfidos.
Cuajado y maduración de semillas
Después de la polinización, se desarrollan pequeñas cápsulas de semillas con tres cámaras a lo largo de la espiga floral gastada. Cada cápsula contiene numerosas semillas pequeñas, redondas y brillantes de color negro. Las cápsulas comienzan verdes y gradualmente se secan hasta un marrón papiráceo al madurar. Mientras tanto, el follaje continúa fotosintetizando activamente, canalizando energía de vuelta al bulbo para reponer sus reservas de almidón e inulina para la próxima temporada de crecimiento. Esta persistencia foliar posterior a la floración es esencial para la salud a largo plazo del bulbo.
Senescencia foliar y letargo estival
A mediados de verano, el follaje herbáceo comienza a amarillear y marchitarse a medida que el bulbo entra en letargo estival. La transición de verde a amarillo y luego a marrón ocurre gradualmente a lo largo de tres a cuatro semanas. Una vez que el follaje ha muerto por completo, el bulbo permanece en reposo bajo tierra durante los meses secos de verano. El bulbo ha almacenado ahora suficiente energía — principalmente en forma de inulina — para sostener el ciclo de crecimiento del año siguiente. Los bulbillos de desplazamiento pueden haberse formado junto al bulbo madre durante la temporada.
Plantación otoñal y establecimiento
El otoño es el momento tradicional y óptimo para plantar nuevos bulbos de camassia. A medida que las temperaturas descienden y comienzan las lluvias otoñales, los bulbos recién plantados emiten su primer crecimiento radicular en el suelo circundante. Los bulbos establecidos también comienzan a extender nuevas raíces en preparación para el invierno. Los bulbos requieren un periodo de temperaturas frías invernales para vernalizar adecuadamente y desencadenar una floración fiable en primavera. Los bulbos plantados a principios o mediados de otoño tienen la mayor ventana de establecimiento antes de que comience el crecimiento primaveral.
Deje la zona de plantación sin perturbar durante el invierno. Si plantó bulbos en otoño, asegúrese de que el área permanezca naturalmente húmeda pero no encharcada. Evite caminar sobre las zonas de plantación cuando el suelo esté saturado, ya que la compactación puede dificultar la emergencia primaveral. Marque las ubicaciones de plantación con pequeñas estacas para no desenterrar accidentalmente los bulbos en reposo.

Cuidar Camassia mes a mes
Qué hacer cada mes para tu Camassia
Julio
Mes actualNo hay tareas de cuidado específicas para este mes.
Cosechar Camassia
Corte las espigas de camassia para arreglos florales cuando las flores inferiores de la espiga estén empezando a abrirse y los capullos superiores permanezcan aún cerrados. Las espigas continuarán abriéndose de abajo hacia arriba durante siete a diez días en un jarrón. Córtelas a primera hora de la mañana con tijeras de podar limpias y afiladas, y coloque los tallos en agua fresca y profunda de inmediato. Las elegantes espiras azules combinan maravillosamente con tulipanes, alliums y follaje primaveral fresco en ramos mixtos.
Contamos los días y te decimos cuándo recoger
Dinos cuándo plantaste y PlotMyGarden sigue la cuenta atrás de 180 días hasta la cosecha — y te avisa el día en que tu Camassia está lista.
Almacenamiento y conservación
Los bulbos de camassia es mejor dejarlos sin perturbar en el suelo, donde se naturalizarán y se multiplicarán con los años. Si se dividen, levante las matas en otoño y replante de inmediato, ya que los bulbos se deshidratan rápidamente y no toleran un almacenamiento prolongado. Envueltos en turba ligeramente húmeda, los bulbos levantados pueden conservarse como máximo unas pocas semanas en un lugar fresco. Las cápsulas de semillas pueden recolectarse cuando estén marrones y secas, y las semillas se almacenan en sobres de papel para siembras otoñales.
Qué falla — y cómo solucionarlo
Babosas y caracoles
PlagaAgujeros irregulares en las hojas emergentes y los capullos florales, rastros de baba visibles sobre el follaje, brotes jóvenes devorados hasta el nivel del suelo.
Mosca del bulbo del narciso
PlagaLos bulbos producen un follaje débil y raquítico o no llegan a brotar. Al desenterrarlos, se encuentran larvas en su interior que han creado cavidades huecas.
Carbón (Ustilago)
EnfermedadMasas oscuras y negras de esporas reemplazan las cápsulas de semillas y ocasionalmente aparecen en las hojas. Las flores afectadas quedan deformadas.
Solución de problemas comunes
El problema más frecuente es plantar en un suelo demasiado seco, ya que la camassia necesita genuinamente condiciones de humedad a encharcamiento durante su temporada de crecimiento primaveral. Los bulbos plantados en suelo arenoso y bien drenado a menudo decaen con el tiempo. El follaje puede lucir desordenado al marchitarse a principios de verano, por lo que conviene intercalar con vivaces que emerjan para disimular las hojas amarillentas. Las babosas pueden ser problemáticas en las condiciones húmedas que la camassia prefiere.
Consejos de cultivo
- Plante los bulbos de camassia en otoño, idealmente de septiembre a noviembre, a una profundidad de 10-15 cm y separados 15-20 cm. Plante en grupos informales de al menos 10-15 bulbos en lugar de filas rígidas para una exhibición más naturalista y visualmente impactante. Como la mayoría de los bulbos primaverales, la camassia luce mejor plantada en cantidades generosas.
- Elija un lugar de plantación con suelo que retenga la humedad y permanezca fiablemente húmedo durante la primavera pero que no esté perpetuamente encharcado. La camassia es uno de los poquísimos bulbos ornamentales que prospera en suelo arcilloso pesado — un rasgo que la diferencia de la mayoría de los otros bulbos de floración primaveral y la hace invaluable para los jardineros con suelo arcilloso.
- El pleno sol produce las espigas florales más fuertes y la floración más prolífica, pero la camassia también rinde bien en sombra ligera o moteada, particularmente en los bordes de bosques caducifolios donde recibe buena luz primaveral antes de que se cierre el dosel arbóreo. Evite la sombra profunda, que resulta en tallos débiles y floración escasa.
- Deje todo el follaje completamente intacto después de la floración hasta que haya amarilleado y muerto de forma natural — esto suele tardar de cuatro a seis semanas después de que se marchiten las últimas flores. El follaje moribundo tiene un aspecto descuidado pero es esencial para recargar el bulbo. Intercale con vivaces de emergencia tardía como geranios resistentes, gramíneas o helechos que crecerán y ocultarán las hojas amarillentas de la camassia.
- La camassia prácticamente no necesita alimentación en suelos de jardín razonablemente fértiles. Un acolchado anual de mantillo de hojas o compost de jardín aplicado a finales del invierno antes de la emergencia proporciona todos los nutrientes necesarios. Evite los abonos ricos en nitrógeno, que promueven el crecimiento foliar a expensas de las flores y pueden hacer que los bulbos sean más susceptibles a la pudrición.
- Levante y divida las matas congestionadas cada cuatro o cinco años a finales de verano, cuando los bulbos están en reposo. Desentierre con cuidado la mata con una horquilla, separe los bulbillos del bulbo madre y replante inmediatamente a la profundidad original. La división revitaliza el rendimiento floral y es la forma más rápida de aumentar su reserva.
- La camassia está en gran medida libre de plagas y enfermedades, lo cual es una de sus grandes ventajas como planta de jardín. Las babosas pueden dañar ocasionalmente el follaje emergente en primaveras muy húmedas, y los bulbos pueden pudrirse en suelos encharcados durante el invierno si el drenaje es excepcionalmente pobre. Por lo demás, no es necesario ningún control regular de plagas o enfermedades.
- Para naturalizar en césped — una de las formas más hermosas de cultivar la camassia — esparza los bulbos al azar por el área deseada y plántelos donde caigan. Ajuste el régimen de siega para evitar cortar el césped en la zona de camas hasta al menos seis semanas después de la floración, permitiendo que el follaje muera de forma natural y que los bulbos se recarguen completamente.
- La camassia también puede cultivarse con éxito a partir de semillas, aunque requiere paciencia. Siembre semilla fresca en otoño en macetas con sustrato húmedo y arenoso, y déjelas al exterior durante el invierno para una estratificación fría natural. La germinación ocurre en primavera. Las plántulas tardan de tres a cinco años en alcanzar el tamaño de floración, pero las plantas obtenidas de semilla son genéticamente diversas y a menudo producen colonias vigorosas y bien adaptadas.
- Distinga las especies comestibles de Camassia del camas venenoso (Anticlea elegans, anteriormente Zigadenus) por el color de la flor — la camassia verdadera tiene flores azules, violetas o púrpuras, mientras que el camas venenoso produce flores blancas, crema o amarillo verdoso. Nunca coseche bulbos para comer a menos que pueda identificar positivamente la especie durante la floración.
Elige tu Camassia
Caerulea
La selección clásica con altas espigas de flores azules estrelladas que alcanzan casi un metro, excepcional para naturalizar en prados húmedos y jardines de lluvia.
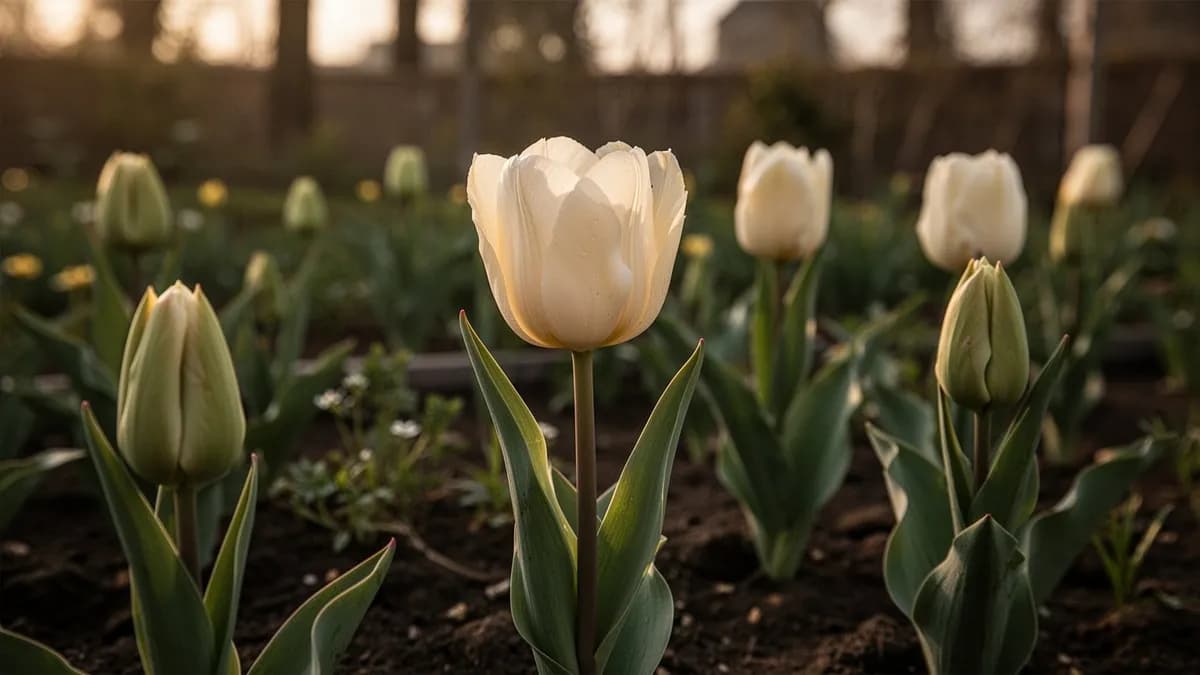
Alba
Una forma de blanco puro que ilumina los rincones sombreados y húmedos del jardín y resulta espectacular plantada junto a las especies de flores azules.
Semiplena
Una forma semidoble poco común con pétalos extra que crean espigas florales más llenas y llamativas en un suave tono blanco cremoso.
Los bulbos de camassia se venden en proveedores especializados a entre 0.80 y 2.50 dólares por bulbo, según la especie y el cultivar, con cultivares prémium como C. leichtlinii 'Caerulea' a precios más altos. Una sola mata establecida se multiplicará de forma constante mediante bulbillos de desplazamiento, duplicando típicamente su número de bulbos cada tres o cuatro años sin ninguna intervención. Una inversión inicial modesta de 25-50 bulbos (20-125 dólares) puede expandirse en una colonia naturalizada sustancial de varios cientos de bulbos en una década, proporcionando tanto una exhibición ornamental cada vez más impresionante con un valor de cientos de dólares en vivero equivalente como, para quienes se interesen en el uso alimentario tradicional, un suministro renovable de bulbos comestibles. Como flor cortada, los tallos de camassia se venden a entre 3 y 6 dólares por tallo en mercados de agricultores y floristerías, y una mata bien establecida puede producir de 20 a 40 tallos cosechables por temporada.
Recetas rápidas

Bulbos de camas asados en horno de tierra tradicional
2 horas activas, 24-48 horas de cocciónEl método indígena auténtico para cocinar los bulbos de camas los transforma de almidonados e indigeribles en profundamente dulces y caramelizados. Se reviste un foso con piedras calentadas al fuego, se cubre con vegetación húmeda, se llena con bulbos de camas y se sella con tierra para asarlos lentamente durante uno a dos días. El calor prolongado a baja temperatura convierte la inulina de los bulbos en fructosa, produciendo un resultado oscuro, dulce y casi similar a la melaza. Este método requiere espacio al aire libre y paciencia, pero produce el sabor más auténtico.
5 ingredientesBulbos de camas asados al horno con hierbas
15 minutos activos, 8-12 horas de asado lentoUna adaptación moderna de la cocción tradicional del camas que utiliza un horno a baja temperatura para lograr la misma conversión de inulina a fructosa. Los bulbos se envuelven en papel de aluminio con hierbas aromáticas y un chorrito de agua, y luego se asan lentamente a muy baja temperatura durante toda la noche. El resultado son bulbos tiernos y dulces con un sabor que recuerda a las castañas asadas cruzadas con boniato. Este es el método más práctico para los jardineros caseros que deseen experimentar este alimento histórico.
6 ingredientesPuré de camas y hortalizas de raíz
30 minutos activos, 9 horas en total incluyendo asado lentoLos bulbos de camas previamente asados se combinan con chirivías y ajo asados, y luego se trituran juntos en una guarnición sedosa y naturalmente dulce. La dulzura del camas cocinado lentamente combina bellamente con el sabor terroso de la chirivía. Esta receta tiende un puente entre las formas alimentarias indígenas tradicionales y las técnicas de cocina modernas familiares, creando un acompañamiento único y que genera conversación para carnes asadas o verduras a la parrilla.
6 ingredientesUsos culinarios
Los bulbos de camassia fueron una fuente de alimento de importancia capital para los pueblos indígenas del noroeste del Pacífico, quienes los asaban lentamente en hornos de tierra durante hasta dos días para convertir la inulina en un almidón dulce y digerible. Los bulbos asados tienen un sabor similar al boniato o la castaña. Es imprescindible una identificación positiva, ya que la zigadeno o camas venenoso, de aspecto similar, es extremadamente tóxico.
Qué contiene
Beneficios para la salud
- Los bulbos de camas cocidos son excepcionalmente ricos en fructooligosacáridos derivados de la inulina, que actúan como potentes compuestos prebióticos alimentando selectivamente las especies beneficiosas de Bifidobacterium y Lactobacillus en el intestino, promoviendo un microbioma intestinal sano y diverso
- El alto contenido de inulina de los bulbos de camas — incluso después de la conversión parcial mediante la cocción — favorece la mejora de la absorción de calcio y magnesio en el intestino grueso, un mecanismo confirmado en estudios clínicos de alimentos ricos en inulina y vinculado a una mayor densidad mineral ósea
- Los bulbos de camas proporcionan una fuente de carbohidratos de liberación sostenida con un impacto glucémico relativamente bajo en comparación con los almidones refinados, ya que la fructosa y la inulina residual se absorben más gradualmente que los almidones basados en glucosa, contribuyendo a niveles estables de glucosa en sangre
- El contenido significativo de potasio de los bulbos de camas cocidos contribuye a una regulación saludable de la presión arterial al contrarrestar el sodio dietético, y una ingesta adecuada de potasio se asocia consistentemente con un riesgo reducido de enfermedad cardiovascular en grandes estudios poblacionales
- Como fuente de carbohidratos integrales naturalmente baja en grasa y sodio, los bulbos de camas cocidos apoyan patrones dietéticos saludables para el corazón y proporcionan energía sostenida sin los efectos inflamatorios asociados a los alimentos con carbohidratos altamente procesados
- Las dietas indígenas tradicionales que incluían el camas como fuente principal de carbohidratos se asociaban con tasas más bajas de enfermedades metabólicas, y el alto contenido de fibra y prebióticos del camas es consistente con la ciencia nutricional moderna que vincula la fibra dietética a riesgos reducidos de cáncer colorrectal y diabetes tipo 2
De dónde viene Camassia
Camassia es un género de plantas perennes bulbosas de la familia Asparagaceae, nativo exclusivamente de Norteamérica. El género comprende de cinco a seis especies distribuidas desde el sur de la Columbia Británica y Alberta hacia el sur a través del noroeste del Pacífico, los estados de las Montañas Rocosas y las praderas del centro de los Estados Unidos. El nombre común 'camas' deriva de la palabra nez percé (nimiipu) 'qem'es', reflejando las profundas raíces de la planta en la cultura indígena. Las evidencias arqueológicas de sitios en Oregón, Washington, Idaho y la Columbia Británica confirman que los bulbos de camas se han cosechado y procesado como fuente alimentaria durante al menos 8.000 años, y posiblemente mucho más. Para decenas de naciones indígenas — incluyendo los nez percé, salish, klamath, chinook, yakama y muchos otros — el camas fue una de las fuentes de alimento vegetal más importantes, comparable en importancia dietética al salmón y al bisonte. Las comunidades mantenían extensas praderas de camas mediante quemas controladas deliberadas, una práctica que suprimía la vegetación competidora y aumentaba drásticamente el rendimiento de los bulbos. La cosecha se realizaba típicamente a finales de primavera y principios de verano, después de que las plantas florecieran, utilizando palos de cavar afilados. Los bulbos se procesaban entonces en grandes hornos comunitarios de tierra — fosas poco profundas revestidas con piedras calientes y cubiertas con capas de vegetación y tierra — donde se cocinaban lentamente durante uno a tres días. Este calentamiento prolongado descomponía la inulina de los bulbos en azúcares de fructosa dulces, transformándolos de una masa almidonada e indigerible en un alimento dulce, nutritivo y denso en calorías que podía secarse y almacenarse para el invierno. La llegada de los colonos europeos en el siglo XIX devastó las praderas de camas en todo el noroeste del Pacífico. La conversión agrícola, el pastoreo de ganado, el desarrollo urbano y la supresión de las prácticas indígenas de manejo con fuego eliminaron la gran mayoría del hábitat productivo de camas. Hoy en día, ecólogos de restauración y comunidades indígenas trabajan para revivir las praderas de camas como parte de esfuerzos más amplios para restaurar ecosistemas nativos y reconectarse con las formas alimentarias tradicionales. En la horticultura ornamental, la camassia se introdujo en los jardines europeos a principios del siglo XIX y se ha convertido en un valioso bulbo de floración tardía primaveral, especialmente apreciado para naturalizar en prados húmedos y bordes de bosque donde pocos otros bulbos prosperan.
Camassia: ¿sabías que?
Datos fascinantes sobre Camassia
Los bulbos de camas fueron uno de los alimentos vegetales más importantes para los pueblos indígenas de todo el noroeste del Pacífico, desde el sur de la Columbia Británica hasta el norte de California. Comunidades enteras se trasladaban a las praderas de camas durante la temporada de cosecha primaveral, y los bulbos eran tan vitales para la supervivencia que se libraron guerras por el acceso a las praderas productivas de camas.
Camassia: preguntas frecuentes
¿Cuándo debo plantar Camassia?
¿Cuáles son buenas plantas acompañantes para Camassia?
¿En qué zonas de rusticidad puede crecer Camassia?
¿Cuánto sol necesita Camassia?
¿A qué distancia debo espaciar Camassia?
¿Qué plagas y enfermedades afectan a Camassia?
¿Cómo almaceno Camassia después de la cosecha?
¿Cuáles son las mejores variedades de Camassia para cultivar?
¿Qué suelo necesita Camassia?
¿Puedo comer los bulbos de camassia de mi jardín, y cómo los preparo de forma segura?
¿Cuál es la diferencia entre Camassia quamash y Camassia leichtlinii?
¿Por qué mi camassia no florece, aunque el follaje emerge cada año?
¿Es la camassia adecuada para suelos arcillosos pesados?
¿Cómo naturalizo la camassia en un césped o pradera?
¿Qué es el camas venenoso y cómo lo distingo de la camassia comestible?
Acabas de leer la teoría. Ahora cultívala en piloto automático.
Todo lo que hace que Camassia sea delicado — el momento, el espaciado, las asociaciones, la ventana de cosecha — es justo lo que PlotMyGarden resuelve por ti, para cada planta de tu huerto.
Un plan que conoce tu clima
Indica tu ubicación una vez. Recibe fechas de siembra, abonado y cosecha basadas en tu última helada real y el pronóstico en vivo — sin adivinar con un sobre genérico.
De la sección “Cuándo plantar”Planificador de bancales de arrastrar y soltar
Diseña bancales sobre una cuadrícula. Cada planta encaja con su espaciado correcto y ves toda la temporada antes de gastar un céntimo en semillas.
De la sección “Cultivo”Conflictos de asociación, detectados a tiempo
Más de 200 buenas y malas combinaciones comprobadas en vivo mientras plantas — para que un error que arruine la temporada nunca llegue a la tierra.
De la sección “Asociaciones”Recordatorios que sí vas a seguir
“Riega las judías.” “Recoge hoy antes de que se pase.” Oportunos, concretos y ligados a las plantas que de verdad cultivas.
De la sección “Cosecha”Escalonado, programado
¿Quieres cosechar seis semanas en vez de seis días? Reparte tus siembras automáticamente y te avisa cuando toca el siguiente lote.
De la sección “Cuándo plantar”Un registro que se vuelve más listo
Cada cosecha que registras le enseña tu huerto. El plan del año que viene parte de lo que de verdad funcionó en tu suelo, no en un manual.
De la sección “Resumen”Planta estos junto a Camassia


Más Bulbosas


Cultiva tu mejor Camassia — y todo lo que la rodea.
Empieza un plan gratis hoy. Diseña tus bancales, coloca tu Camassia y deja que PlotMyGarden gestione el momento, el espaciado, las asociaciones y los recordatorios de la semilla a la cesta.